IN THIS ARTICLE
O3DE Code Contribution GitHub Workflow
Looking to submit new or changed code to Open 3D Engine (O3DE)? Exciting! Follow the guidance below to submit your first PR.
GitHub Code Contribution Workflow
The O3DE base repository is on GitHub at https://github.com/o3de/o3de .

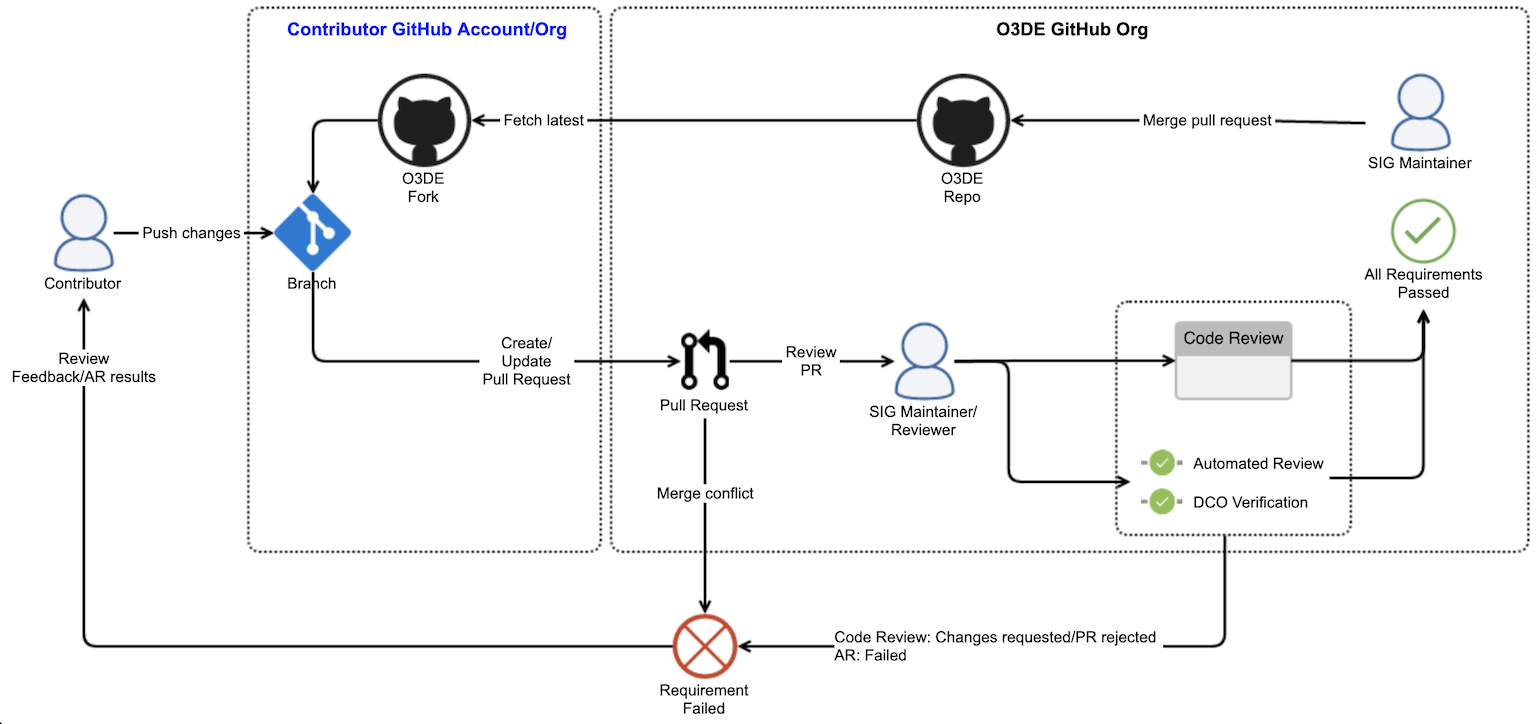
At a high level, the workflow is:
Create a branch from the local clone of your fork, do your work, push it to your fork (origin), and submit a pull request from your fork to the O3DE GitHub repo (upstream).
Your pull request is checked for merge conflicts. If one is found, the pull request is rejected.
If there are no merge conflicts, automated review (AR) is triggered and the pull request is flagged for code review.
If the pull requests passes code review, the SIG maintainer (or a delegate) will merge it into the
developmentbranch of the O3DE GitHub repo.
Initial Git contribution workflow steps
Create a fork of
https://github.com/o3de/o3de.gitinto your own GitHub account. To do this, go to the O3DE public GitHub repo at https://github.com/o3de/o3de and create a fork by selecting the “Fork” button in the upper-right. This will clone the O3DE public repo into your repo, and may take a few minutes. The URL for your fork will be something likehttps://github.com/<YOUR GITHUB NAME HERE>/o3de.git.Now, clone your fork locally by opening GitBash (or a Git-enabled shell or utility). Change directories to the folder you want to clone the repo in and run:
git clone https://github.com/<YOUR GITHUB NAME HERE>/o3de.git. You will now have the clone of your fork on your local desktop and can work with the files directly.However, to simplify this workflow, you must make some changes to your local Git configuration. In this case, you will be setting your fork’s URL as the
originrepo, and the O3DE public repo as yourupstreamrepo, and updating the LFS URL. Run the following Git commands from your locally cloned fork’s path:git remote add upstream https://github.com/o3de/o3de.gitConfirm that
upstreampoints to the O3DE public repo and thatoriginpoints to your fork:git remote -vMinimally, you should see output that looks like this:
origin  https://github.com/<FORK>/o3de.git (fetch)
origin  https://github.com/<FORK>/o3de.git (push)
upstream  https://github.com/o3de/o3de.git (fetch)
upstream  https://github.com/o3de/o3de.git (push)
You can also configure upstream to target specific branches, as well.
Update the LFS URL to include your fork. This will enable you to push changes to large files. Open the .lfsconfig file at the root of the repository for complete instructions and the DISTRIBUTION to use.
git config lfs.url https://<DISTRIBUTION>.cloudfront.net/api/v1/fork/<FORK>You may be prompted to re-authenticate the next time you pull or push. Remember to use your GitHub personal access token not your GitHub password.
If you need to revert this change later you can run the following command:
git config --unset lfs.urlNow, update your local repo by
git fetching the branches currently active on the O3DE repo. You can get all working branches withgit fetch upstream --all, or fetch a specific branch withgit fetch upstream <name-of-branch>.Rebase the commit history to the last commit from the upstream
developmentbranch:git rebase upstream/developmentCheck out the branch you will be working on and take your own branch from it to perform your work.
git checkout <name-of-fetched-branch>Confirm you have switched branches successfully with
git branch. If you are on the branch you want, create your own branch from it:git checkout -b <name-of-your-working-branch>
Ongoing Git workflow steps
Now, you’re ready to do some work! After you’ve made some changes and saved your work, it’s time to submit it as a pull request (PR) for review.
(Optional): First, depending on how much time has passed since your branch was initially created, you might want to merge the latest from
upstream/developmentinto your branch. This will ensure your changes don’t conflict with any other recent code commits, and also gives your automated review (AR) the best chance of success, because your branch will be closer to the latest development snapshot.You can do this with the following commands (Check which branch you are on with
git branchfirst!):git fetch upstream --all git pull git merge upstream/development --signoffNext, stage (add) the new or modified code files, commit your changes, and submit a pull request to your fork (origin) with the following commands. (Check which branch you are on with
git branchfirst!):git add . git commit -s -m "<commmit_message>" git push -u origin <your-branch-name>This will push the update to your fork, and NOT the O3DE code repo.
Note:We require DCO signing on all code commits. This requires that you have both your contributor name and email address in your.gitconfigfile, or have previously run the following Git commands from a Git-enabled shell:git config user.name "YOUR CONTRIBUTOR NAME HERE"git config user.email "YOUR CONTRIBUTOR CONTACT MAIL HERE". (This command updates your.gitconfig.) You must use the-soption on every commit. If you are using a Git-enabled IDE, such as Visual Studio or Visual Studio Code, turn on commit signing in the preferences.(Optional): Test your branch with Jenkins.
The source for the code build pipeline and the required infrastructure is stored in the O3DE repo. Contributors can utilize this to spin up their own build/test pipeline or they can test locally.
The
Jenkinsfile(AutomatedReview/Jenkinsfile) is the source for the Automated Review (AR)/Jenkins Pipeline used by O3DE. Refer to Simulate an automated review run in the user guide for more information on how to run a test locally.The scripts to install all the dependencies on the build nodes and other infrastructure setup scripts are also stored in the repo for contributors and customers to use.
Submit a pull request from your fork to the O3DE code repo.
- Navigate to your fork repo in GitHub, click the Pull Requests tab and click New Pull Request.
- On the Compare page, verify the base repo and branch point is set to
O3DE/development. (This should be set by default.) - In the
headdrop down menu, select your fork repo and branch, and then select Create Pull Request.

- Add a title and description for your pull request. Provide a clear scope of your changes in as few words as you can.
- Add reviewers (Note: Required reviewers and other PR requirements will be finalized in a
CONTRIBUTING.mdfile).

- Now, select Create pull request!
The SIG maintainer/reviewer (or a delegate) for the affected component reviews the pull request. At the same time, the automated review (AR) is triggered.
Note:The SIG maintainer/reviewer will review the pull request and must approve the AR run before it can start. This is to required to prevent the pipeline from running malicious code. The AR build that is triggered on pull requests runs on the infrastructure owned by O3DE.Once all review comments have been addressed, a SIG member will approve the pull request.
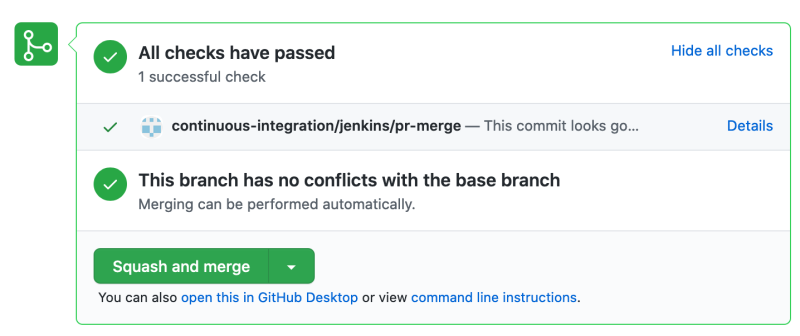
The pull request receives the required approvals from SIG and the AR passes.

The SIG maintainer (or a delegate) can then merge your pull request into
o3de/development, and you’re done! Nice!
Reviews and feedback on pull requests
The SIG maintainer/reviewer can request changes by providing feedback. You should engage with the comments and make any valid corrections or updates to your code contribution on the same branch. If the automated review (AR) fails, review the errors, make any necessary fixes, and update the pull request on the same branch.

If you do not make the changes to pass the AR, or ignore the code review feedback, the SIG maintainer may reject the changes in the pull request by marking it closed.
