IN THIS ARTICLE
Porting Terrains
This tutorial teaches you how export terrain data from Lumberyard to a set of textures, and how to use these textures with O3DE terrain system to create a terrain with the same topography and overall look.
| O3DE Experience | Time to Complete | Feature Focus | Last Updated |
|---|---|---|---|
| Beginner | 20 Minutes | Port terrain data from Lumberyard to O3DE | February 27, 2024 |
Export heightmap and splat maps from Lumberyard
Open the Starter Game project project with Lumberyard, open the main map and via the top menu open “Tools/Terrain Editor” (steps 1. and 2.).
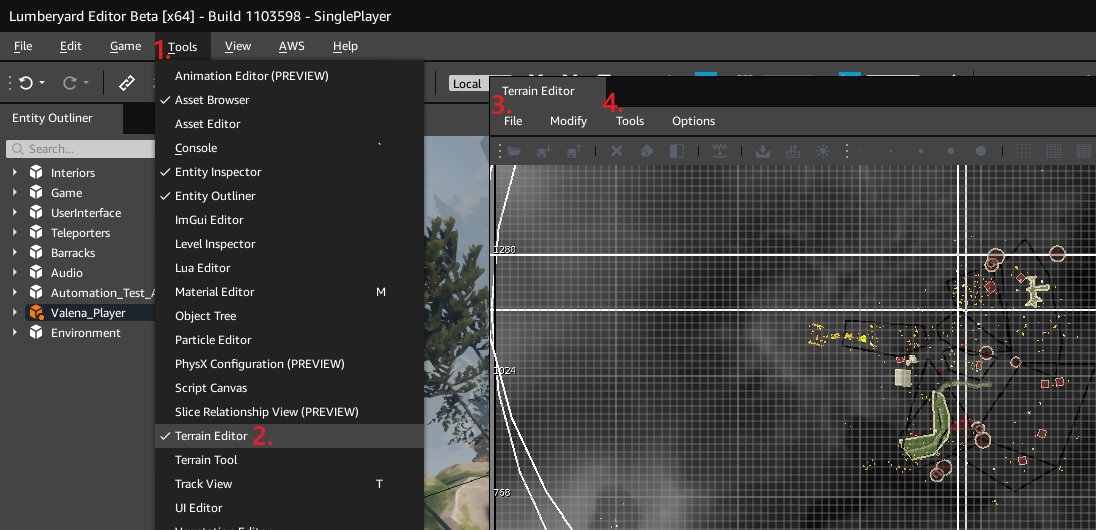
Via the Terrain Editor File menu (step 3.) you will be able to export the heightmap of this terrain. You can name it heightmap_gsi.tif and place it in your O3DE project or Gem (the _gsi is important for O3DE to know how to import this texture).
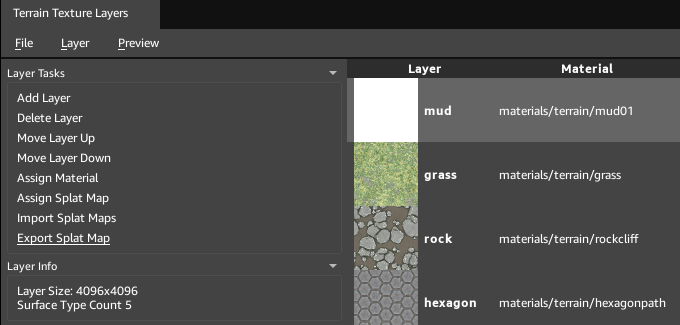
Then you can open the Terrain Texture Layers via the Tools menu (step 4.) and click on “Export Splat Map” for each layer. You can name them as you like and import them in your O3DE project.
Don’t forget to close the Lumberyard Asset Processor from the taskbar when you are done.
Create the terrain in O3DE
You will need to enable the Terrain Gem and the Surface Data Gem on your project (follow this documentation to learn how to enable Gems) then open the SinglePlayer level.
In the Entity Outliner on the left, select the SinglePlayer prefab at the very top. Add both the Terrain World and Terrain World Renderer level components.
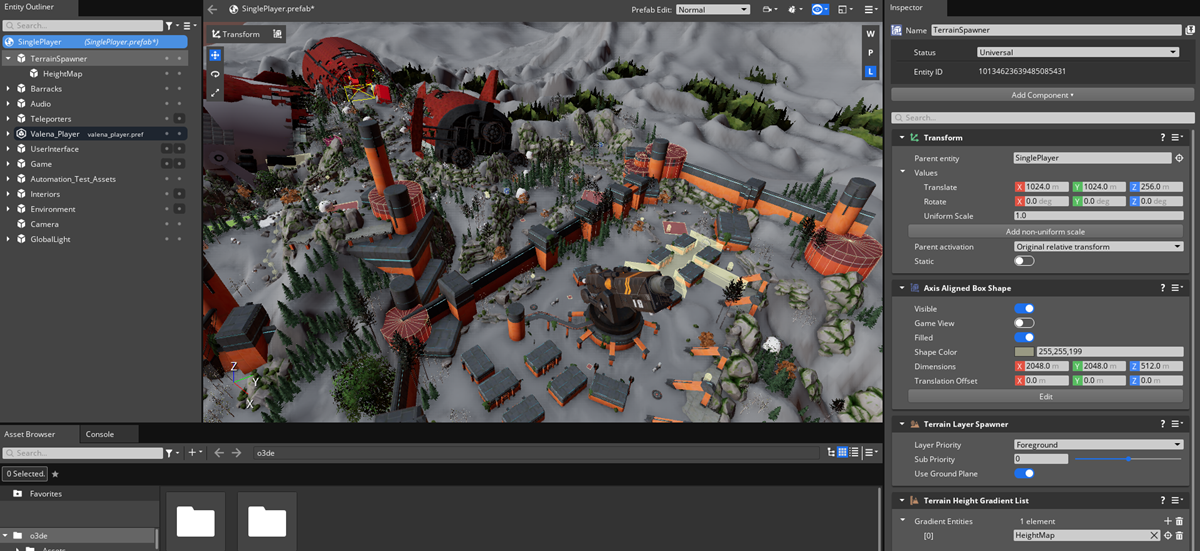
Create a new entity and rename it to “TerrainSpawner”. Create a child entity and rename it to “HeightMap”. Select the “TerrainSpawner” entity :
- Set its translation to (1024, 1024, 256).
- Add a Terrain Layer Spawner. It will displays a warning about missing a required component.
- Choose Add Required Component and select Axis Aligned Box Shape from the list. You can set the box dimensions to (2048, 2048, 512).
- Finally add a Terrain Height Gradient List component. Pick the HeightMap entity from the Entity Outliner.
Now you can select the “HeightMap” entity :
- Set its translation to (0, 0, 0).
- Add a Shape Reference component and pick the “TerrainSpawner” entity from the Entity Outliner.
- Add a GradientTransformModifier component and an Image Gradient component. Save the level.
- In the Image Gradient, pick the
heightmap_gsi.tif(select the StreamingImage with dropdown, else there is currently a crash if you pick the image)
You level should look like the image below.
Re-create terrain materials in O3DE
We need to port by hand 5 terrain materials located in Lumberyard in YOUR_LUMBERYARD_FOLDER\dev\Gems\StarterGame\Environment\Assets\Materials\Terrain. They depends on the textures located in YOUR_LUMBERYARD_FOLDER\dev\Gems\StarterGame\Environment\Assets\Textures\Terrain, so copy this folder to your O3DE project or Gem.
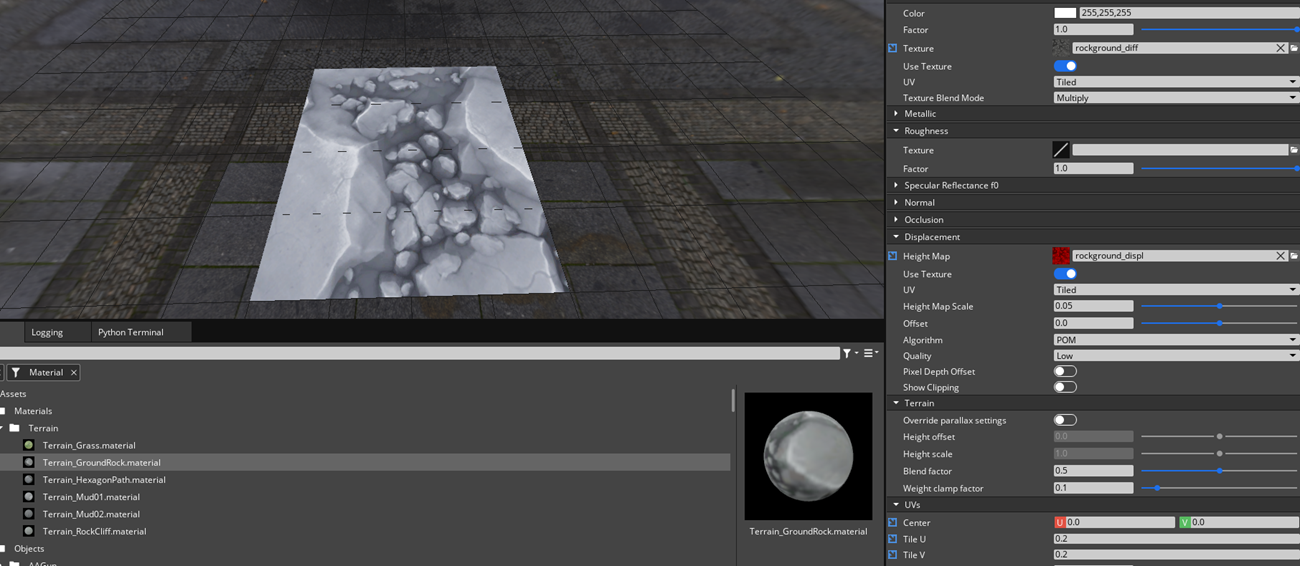
If you open the .mtl files with a text editor you will see that they are quite simple materials. In O3DE you can right click in your asset browser to create a new material and select the “Terrain Detail Material” type. Then the values that you need to fill are :
- Base color texture -> Use the “_diff” texture
- Displacement Height Map -> Use the “_displ” texture
- UVs Center (always 0,0), Tile U and Tile V (use the diffuse map UVs)
You have an exemple on the image below for the GroundRock material ported in O3DE.
Assign terrain materials in O3DE
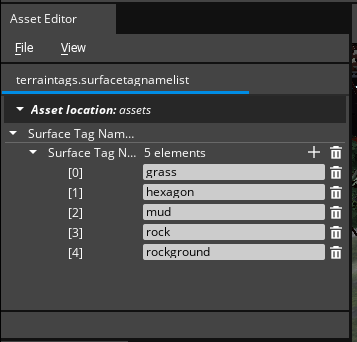
As we are introducing 5 new terrain materials, we need to create a new asset of type Surface Tag Name List. To do so open the Asset Editor (from top bar Tools menu) and select “File/New/Surface Tag Name List”.
Add entries for “grass”, “hexagon”, “mud”, “rock”, “rockground” and save the asset in your project Asset folder.
Select the “TerrainSpawner” entity and create 5 new child entities. Their names will be “Grass”, “Hexagon”, “Mud”, “Rock” and “RockGround”. For each of them :
- Set its translation to (0, 0, 0).
- Add a Shape Reference component and pick the “TerrainSpawner” entity from the Entity Outliner.
- Add a GradientTransformModifier component and an Image Gradient component. Save the level.
- In the Image Gradient, pick the splat map which corresponds to it.
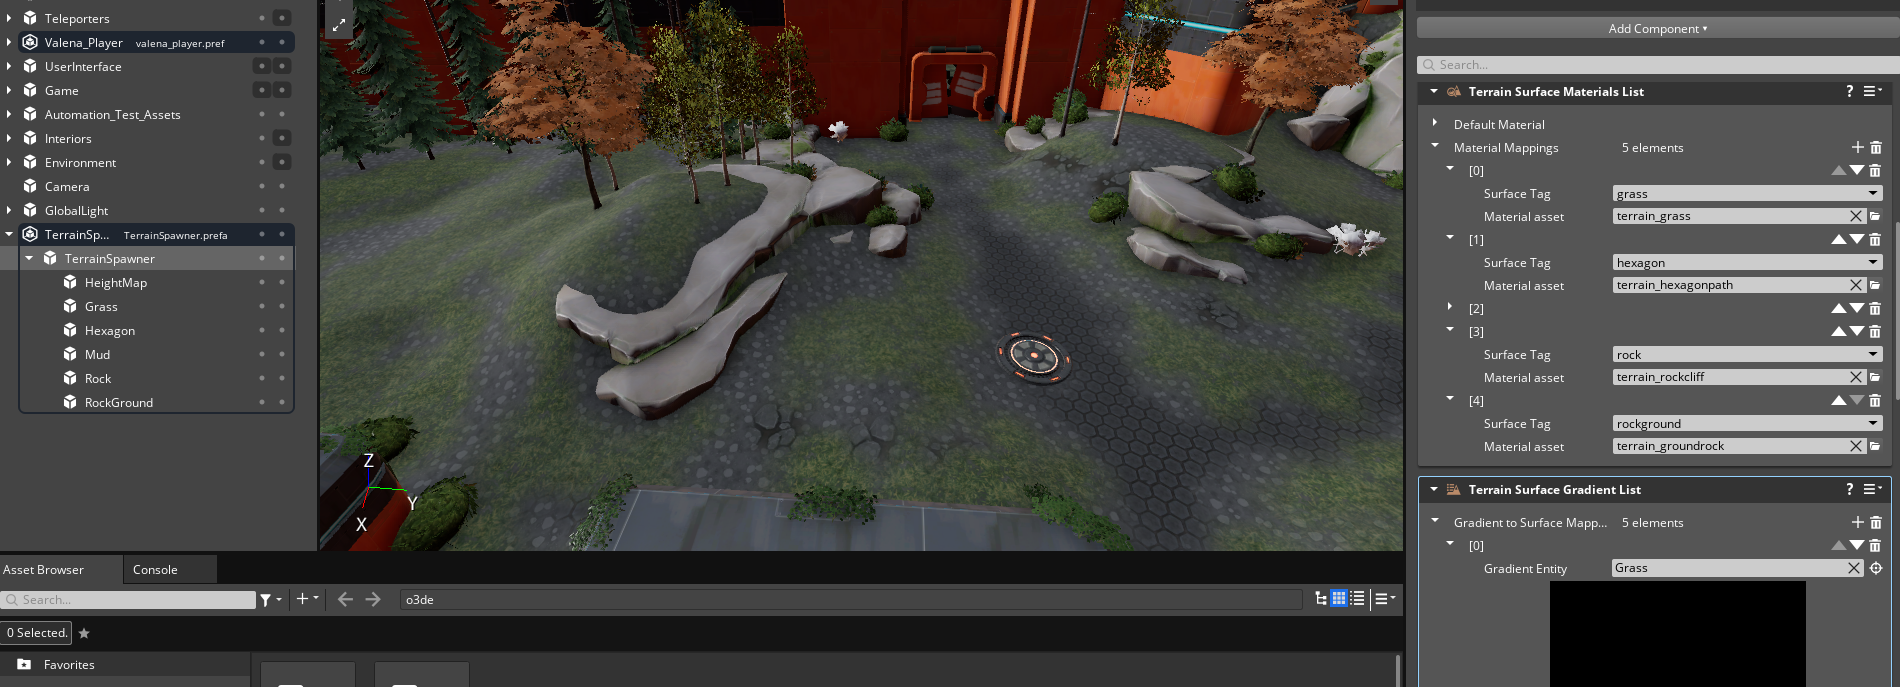
Then re-select the “TerrainSpawner” entity :
- Add a Terrain Surface Materials List component. You need to add the 5 terrain materials and give them the right Surface Tag (Grass tag with terrain_grass material, etc..)
- Add a Terrain Surface Gradient List component. You need to add 5 entries and pick each surface entity from the Entity Outliner, and give them the right Surface Tag (Grass entity with Grass tag, etc..).
Your level should look like the image below.