IN THIS ARTICLE
Create Wind Forces
With the PhysX Force Region component, you can create global wind forces or localized wind forces contained within a collider volume. Wind forces act on entities with components that are affected by wind, such as Cloth components. For this tutorial, make sure that you have the NVIDIA Cloth Gem enabled in your project so that you can easily test the results of the wind provider entity.
Note:Wind forces only affect components that support it, such as Cloth compopnents. Wind forces can’t affect PhysX Dynamic Rigid Body components.
Create a wind provider entity
In this section, you’ll set up an entity for the wind provider.
Create an entity for the wind provider.
Add a Tag component to the entity. The Tag component specifies whether the wind force is global or localized.
Add a tag value to specify the wind type. To determine what value to use for the Tag component, from the Tools menu, choose PhysX Configuration. At the bottom of the Global Configuration tab, there is a section labeled Wind Configuration.

Wind Configuration includes the Global wind tag and Local wind tag properties. You can use the default values or set them as desired. The PhysX system uses these tags to identify entities that provide wind forces.
For this example, use the Global wind tag property value. In the Tag component of the entity, choose the
 Add button to add a tag element. Give it the value
 global_wind.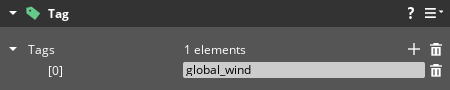 Note:If you choose to use the Local wind tag property, the wind force affects only entities that are inside the volume of the PhysX Primitive Collider component that you add in the next step.
Define the force region with a PhysX Primitive Collider
In this section, you’ll add a box-shaped PhysX Primitive Collider component to the wind provider entity, and position it in the level.
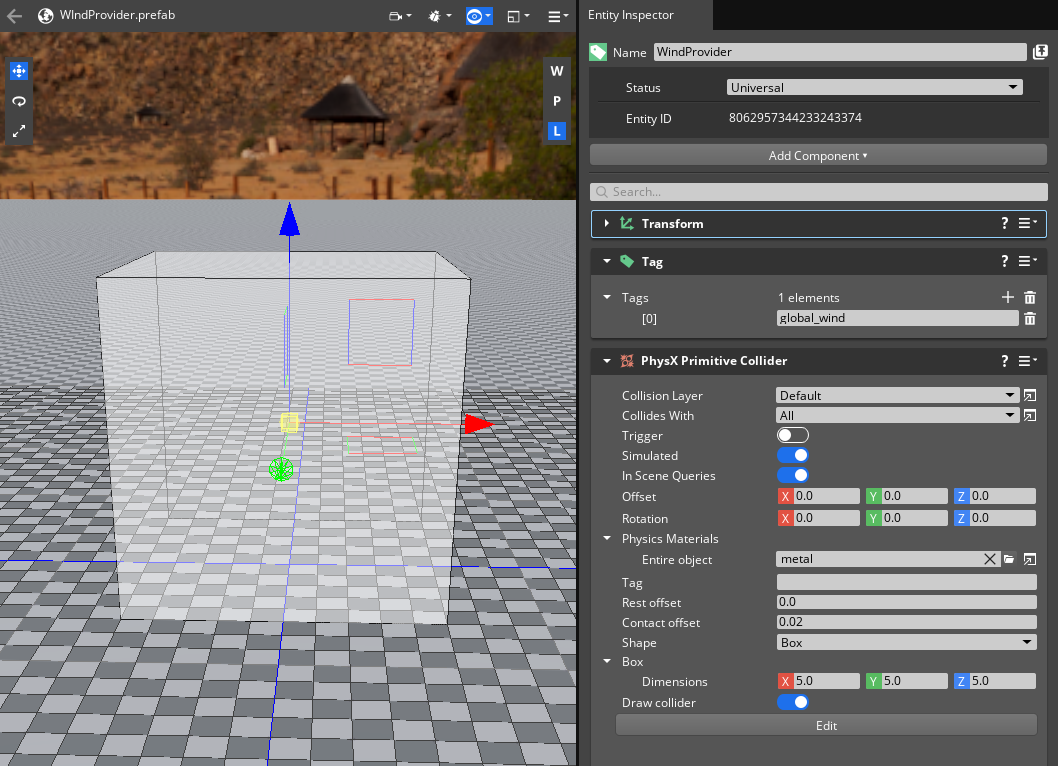
Add a PhysX Primitive Collider component to the wind provider entity. If you are using the Local wind tag property, this collider defines the volume that contains the wind force. With the Global wind tag property, the size and position of this collider aren’t critical because the wind force is global. However, the collider provides a useful visualization for the global wind force.
Set the PhysX Primitive Collider component’s Shape property to
Box.Scale the PhysX Primitive Collider component and position the entity. Set the Box Dimensions property in the PhysX Primitive Collider component as desired. If you are creating a localized wind force, enlarge the collider dimensions to a size that is large enough to contain the entity that receives the wind force. Use the Move tool to place the entity in the level. In the following example, the collider is 5 meters in each dimension, and the wind provider entity is positioned so that the bottom of the box is on the ground plane.
Create a PhysX force region
In this section, you’ll set up a PhysX Force Region component that generates a wind force.
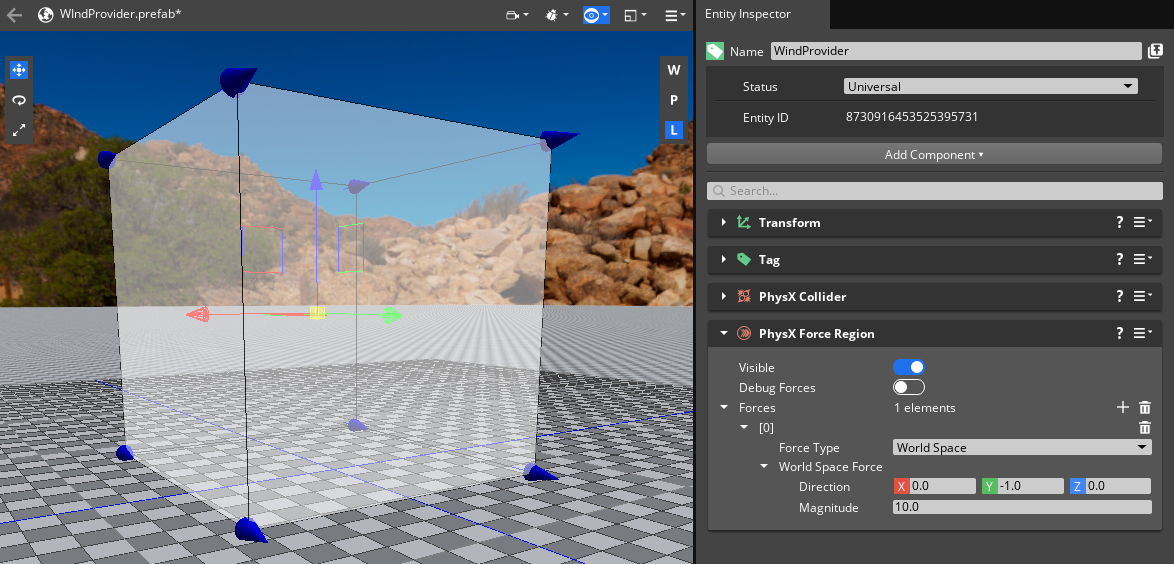
Add a PhysX Force Region component to the entity. This component creates the wind force.
Next to Forces, choose the
Add button to add a new force.In the Direction property of your new force, set the Y component to
-1.0and set the Z component to0.0to create a direction for the wind force.In the Magnitude property, set a value of
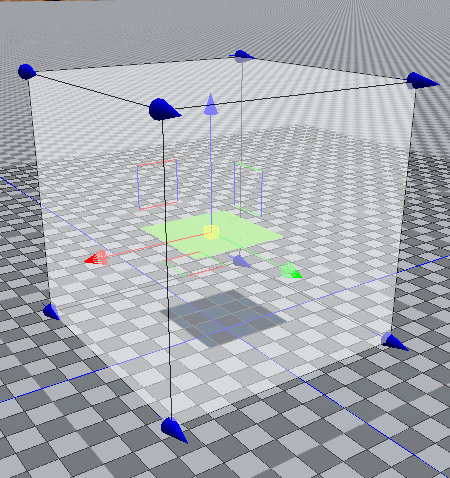
10.0to create magnitude for the wind force.The PhysX Primitive collider box displays cones representing the wind force direction.
Add a cloth prefab
In this section, you’ll add a cloth prefab for testing.
To test the wind provider, add a prefab with an NVIDIA Cloth mesh. In Asset Browser, navigate to
Gems\NvCloth\Assets\prefabs\Cloth, locatecloth_locked_edge.prefab, and then drag it into the viewport.Use the Move tool to place the cloth prefab. If you are using the Local wind tag property, you must place the cloth asset inside the PhysX Primitive Collider volume of the wind provider entity.
With the prefab in position, you can hide the wind provider entity. In Entity Outliner, in the column to the right of the wind provider entity, choose the Show/Hide Entity toggle.
The cloth prefab has the local wind property enabled on its Cloth component. This generates a local wind force from the Cloth component that overrides the wind force from the wind provider entity that you created. To deactivate the local wind force of the prefab so that you can view the results of the wind provider you created, do the following:
In Entity Outliner, double-click the
 cloth_locked_edge prefab to edit it in Focus Mode.
Choose the
 cloth_locked_edge child entity to select it.
With the
cloth_locked_edge entity selected, in Entity Inspector, in the Cloth component, expand the Wind property group and turn off Enable local wind velocity.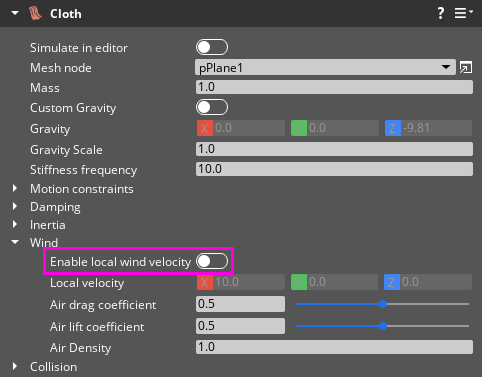
Test the wind simulation
Finally, you can test the simulation. With the cloth_locked_edge prefab open for editing in Focus Mode, do the following:
At the top of the Cloth component, turn on Simulate in editor. As the simulation begins, the cloth object might flip and stretch wildly, but it quickly settles into a breezy wind simulation.
The wind simulation plays while in editor mode. You can adjust the simulation by modifying the various properties of the Cloth component. Try adjusting the following properties in the Cloth component:
- Air drag coefficient
- Air lift coefficient
- Air Density
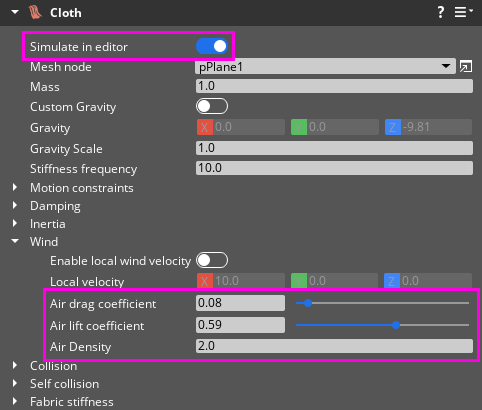
The following video shows the results of using the Cloth component settings shown in the preceding image.