IN THIS ARTICLE
Image Gradient Component
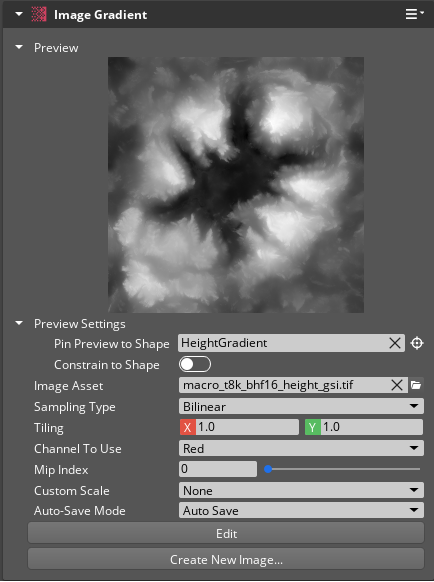
Add the Image Gradient component to generate a gradient from an image. The component provides advanced configuration options, such as tiling, scaling, and custom sampling types. Image creation and editing are also supported.
Provider
Dependencies
Image Gradient properties

| Property | Description | Values | Default |
|---|---|---|---|
| Preview | Displays the output gradient of this component after all properties are applied. | ||
| Pin Preview to Shape | Uses the bounding box of a compatible Shape component from the given entity to determine the world size of the preview. If Constrain to Shape is Enabled, the preview will constrain to the actual shape, not just the shape bounds. | EntityId | Current Entity |
| Preview Position | Sets the world location of the preview. This field is available only if there is no entity selected in Pin Preview to Shape. | Vector3: -Infinity to Infinity | X:0.0, Y:0.0, Z:0.0 |
| Preview Size | Sets the dimensions of the preview. This field is available only if there is no entity selected in Pin Preview to Shape. | Vector3: 0.0 to Infinity | X:1.0, Y:1.0, Z:1.0 |
| Constrain to Shape | If Enabled, the gradient preview uses the bounds of the entity selected in Pin Preview to Shape.This field is available only if an entity is selected in Pin Preview to Shape. | Boolean | Disabled |
| Image Asset | Sets the source image to use as the gradient’s values. NOTE: The Image Gradient currently only supports a subset of all available pixel formats. Most of the uncompressed formats are supported, as well as the BC1 compressed format. For a full list of supported formats, refer to
AZ::RPI::IsImageDataPixelAPISupported . | .streamingimage | None |
| Sampling Type | The sampling type to use on the image data. | Point, Bilinear, Bicubic | Point |
| Tiling | Sets the number of times to tile the image horizontally (X) and vertically (Y). | Vector2: 0.01 to Infinity | X: 1.0, Y: 1.0 |
| Channel To Use | The channel component of the image to sample from. The Terrarium option is for an image-based terrain file format as defined by Mapzen
here . | Red, Green, Blue, Alpha, Terrarium | Red |
| Mip Index | Specify which mip level index to sample from. If you specify a mip level higher than the number of mip levels available in your image, then the highest existing mip index will be used (refer to MipCountMax ). | Int: 0 to 15 | 0 |
| Custom Scale | Choose a value-scaling operation to be applied to all image data. The Auto option will automatically scale the values into the 0-1 range based on the min/max values in the image data. | None, Auto, Manual | None |
| Range Minimum | The minimum value used to scale image data into the 0-1 range for the gradient. All image values at or below the minimum will be scaled to 0.This field is available only if the Custom Scale field is set to Manual. | Float: 0.0 to 1.0 | 0.0 |
| Range Maximum | The maximum value used to scale image data into the 0-1 range for the gradient. All image values at or above the maximum will be scaled to 1.This field is available only if the Custom Scale field is set to Manual. | Float: 0.0 to 1.0 | 1.0 |
| Save Mode | Specify how to choose the path for saving the image after any image edits. | Save As..., Auto Save, Auto Save With Incrementing Names | Auto Save |
Sampling types
There are several sampling types to choose from. Choosing the best sampling type for a specific need is generally a balance between performance and quality.
| Sampling Type | Description | Performance Cost | Quality | Example |
|---|---|---|---|---|
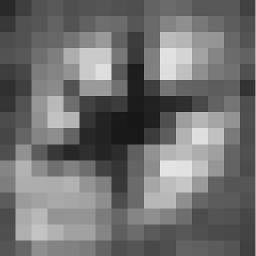
Point | Point sampling is the default and only samples a single point for each pixel of the source image.This will produce blocky artifacts if the image is sampled at a higher frequency than the number of pixels. Point sampling produces the best results when the pixel size exactly matches the sampling frequency. | 1x | Poor |  |
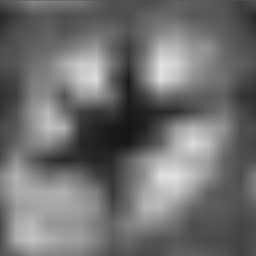
Bilinear | The Bilinear filter smooths out the image by requesting four points in a grid around a requested pixel and then performing interpolation between the points.Because this uses linear interpolation between 4 points, bilinear filtering can cause noticeable plus-shaped artifacts in the smoothed data. Bilinear sampling is the best general-purpose choice, as it balances performance and quality. | 4x | Good |  |
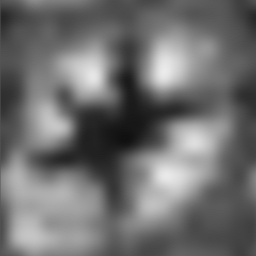
Bicubic | The Bicubic filter smooths out the image by requesting sixteen points in a grid around a requested pixel and then performing Catmull-Rom interpolation between the points.Because this uses non-linear interpolation, there are no noticeable plus-shaped artifacts in the smoothed data. Bicubic sampling is the best choice when quality is needed over performance. | 16x | Great |  |
Creating a new image
To create a new image, press the Create New Image… button. You will be prompted for an image width and height in pixels, then for a location to save the image. If the image is saved into a source asset directory that is used by the project, the Image Gradient will automatically populate the Image Asset field with the saved image.
Important:The image name should end in_gsi(for example,image_gsi.tif). This will ensure that the image is processed by the Asset Processor as a Gradient Signal Image (gsi) asset which will leave the image data uncompressed.
Editing an image
To edit an existing image, press the Edit button on the Image Gradient component or select the Image Gradient component’s icon in the Component Switcher in the viewport. This will enter Paint Brush mode. Refer to the Paint Brush documentation for more details on how to use the Paint Brush.
After editing is complete, end the Paint Brush mode by pressing Esc, pressing the Done button on the Image Gradient component, or by selecting a different component’s icon in the Component Switcher in the viewport. At this point, the image changes will be saved, re-processed by the Asset Processor, and reloaded when processing is complete.
The Save Mode determines where the image will be saved.
| Save Mode | Description |
|---|---|
Save As... | Prompts for a save location every time the image is saved. |
Auto Save | Prompts for a save location the first time the image is saved after loading the level, but on every subsequent save, it automatically overwrites the image in that location. |
Auto Save With Incrementing Names | Automatically saves the image with an incrementing number at the end of the name and only prompts for a save location if there is already an existing image with that name. For example, if the initially-selected image is image_gsi.tif, this will save it as image_gsi.0000.tif, then as image_gsi.0001.tif, then as image_gsi.0002.tif, etc. |
ImageGradientRequestBus
Use the following request functions with the ImageGradientRequestBus EBus interface to communicate with Image Gradient components in your game.
| Request Name | Description | Parameter | Return | Scriptable |
|---|---|---|---|---|
GetImageAssetPath | Returns the path of the AZ::RPI::StreamingImageAsset property. | None | String | Yes |
GetTilingX | Returns the value of the Tiling X property. | None | Float | Yes |
GetTilingY | Returns the value of the Tiling Y property. | None | Float | Yes |
SetImageAssetPath | Sets the path of the AZ::RPI::StreamingImageAsset property using an absolute or relative path to the asset. | String | None | Yes |
SetTilingX | Sets the value of the Tiling X property. | Float | None | Yes |
SetTilingY | Sets the value of the Tiling Y property. | Float | None | Yes |
