IN THIS ARTICLE
Kythera AI Navmesh Generation
Bounds setup
To generate navigation mesh, you will need at least one navmesh bounds in the level.
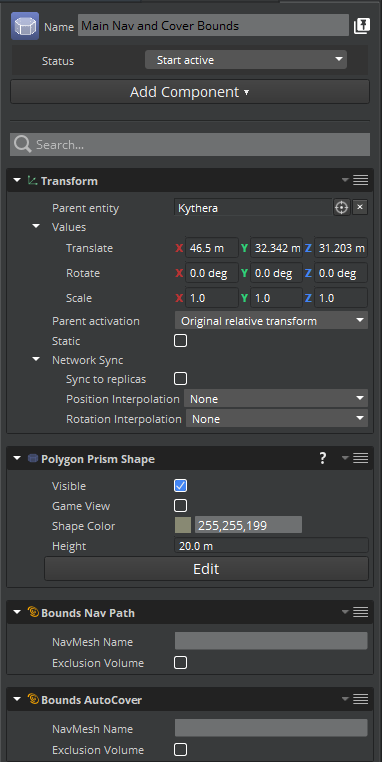
To declare a navmesh bounds, create an entity with a Polygon Prism Shape component to form the bounds, and use a Bounds Nav Path component to mark it for navmesh generation.

Exclusion volumes
If the bounds object has its Exclusion Volume property checked, it will cause the navmesh not to be generated within the bounds. Tiles that intersect the exclusion volume will be clipped.

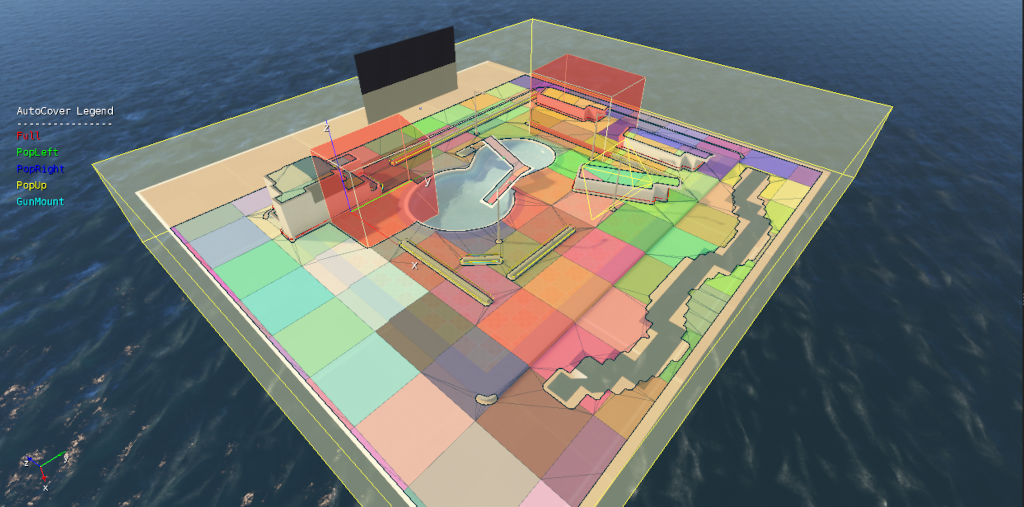
To better differentiate the navmesh bounds from the exclusion volumes, you can set the colors of the Polygon Prism Shape components. In the following example, the exclusion volumes are colored red:

Configuration
Settings for navmesh generation are configured in the NavMesh.xml file. The global NavMesh.xml is placed in the project’s Scripts or Levels directory. For level-specific navmeshes, a NavMesh.xml can be placed in the level’s subdirectory.
Multiple navmeshes may be specified in this file. For example, separate navmeshes can be specified for small and large characters.
Each navmesh must be specified with an entry in the NavMeshNames section of the .xml, declaring its name and type. Refer to the following example NavMesh.xml file.
<NavMeshParams>
 <DefaultNavMeshName type="string">Default</DefaultNavMeshName>
 <DefaultNavMeshType type="string">MediumSizedCharacters</DefaultNavMeshType>
 <NavMeshNames type="bb">
  <Default type="bba">
   <Entry0 type="string">MediumSizedCharacters</Entry0>
  </Default>
  <Boss type="bba">
   <Entry0 type="string">LargeSizedCharacters</Entry0>
  </Boss>
 </NavMeshNames>
 <NavMeshTypes type="bb">
  <MediumSizedCharacters type="bb">
   <AgentHeight type="float">1.720000</AgentHeight>
   <AgentMaxClimb type="float">0.700000</AgentMaxClimb>
   <AgentMaxSlope type="float">45.000000</AgentMaxSlope>
   <AgentRadius type="float">0.600000</AgentRadius>
   <CellHeight type="float">0.050000</CellHeight>
   <CellSize type="float">0.100000</CellSize>
   <Regenerate type="bool">false</Regenerate>
  </MediumSizedCharacters>
  <LargeSizedCharacters type="bb">
   <AgentHeight type="float">1.800000</AgentHeight>
   <AgentMaxClimb type="float">0.700000</AgentMaxClimb>
   <AgentMaxSlope type="float">45.000000</AgentMaxSlope>
   <AgentRadius type="float">2.000000</AgentRadius>
   <CellHeight type="float">0.050000</CellHeight>
   <CellSize type="float">0.100000</CellSize>
   <Regenerate type="bool">false</Regenerate>
  </LargeSizedCharacters>
 </NavMeshTypes>
</NavMeshParams>
Filter physics objects for navmesh generation
Kythera AI can filter which physics objects are considered when generating a navmesh. This is performed by using a PhysX Collision Group. Objects that collide with the specified collision group will be considered for navmesh generation, and those which do not collide with the collision group will be ignored. The collision group can be set on a per-navmesh-type basis by setting a NavmeshPhysicsCollisionGroup parameter in the per-navmesh-type parameters in NavMesh.xml. Refer the PhysXTest demo level for an example of this feature in action, where a “ghost hedge” is ignored by navmesh generation.
Generate a navmesh
To generate or regenerate navmeshes, choose the Regenerate Navmesh button on the Kythera toolbar ( ), or with the console command
 kyt_Generate.
Save a navmesh
To save the navmesh to disk, choose the Save Navmesh button on the Kythera toolbar ( ), or use the console command
 kyt_SaveTiles.
For small levels, saving the navmesh is often unnecessary. Small navmeshes will be generated automatically at runtime.
Visualization
To turn on navmesh debug draw, choose the Debug Draw Navmesh button ( ) on the Kythera toolbar, or set the console variables
 kyt_DrawMaster and kyt_DrawNavMesh to 1. Values higher than 1 will change the details of how the navmesh is drawn.
It’s possible to select which navmesh to visualize by using the combo-box in the Kythera toolbar. The default value is Default navmesh. Alternatively, you can set the console variable kyt_DrawNavMeshName to the name of the navmesh you want to visualize.
Assign navmesh to agents
Agents are assigned a navmesh to use in the global Profiles.xml file.
<NavMeshName type="string">Default</NavMeshName><NavMeshType type="string">MediumSizedCharacters</NavMeshType>
If a navmesh name or type is not specified in an agent’s profile, the values of DefaultNavMeshName and/or DefaultNavMeshType from NavMesh.xml are used.
