IN THIS ARTICLE
Importing robots
ROS 2 Gem for Open 3D Engine (O3DE) includes a Robot Importer tool that imports robots’ descriptions used in the ROS 2 ecosystem.
About supported robot description formats
SDFormat, URDF, and XACRO are widely used robot description standards within the ROS (Robot Operating System) ecosystem.
SDFormat is an XML-based file format used to describe objects and environments for robot simulations. Originally developed for the Gazebo simulator, SDFormat has evolved into a comprehensive standard that covers all aspects of simulation, including static and dynamic objects, visual materials, and physics properties.
Unified Robot Description Format (URDF) is an XML-based file format that describes the physical characteristics of a robot in a structured and standardized way. It includes information about the robot’s joints, links, sensors, and other components, as well as their properties such as mass, inertia, and geometry.
XML Macros (XACRO) is a macro language that simplifies the creation and maintenance of URDF files. XACRO allows you to generate URDF files using XML macros. In XACRO, you can define parameters and include files, which is useful to change and iterate on robot models. You can also expand and reuse XACRO across multiple robot models.
URDF, XACRO, and SDFormat files contain complete robot descriptions, including references to external geometry files. While you can define primitive geometries directly within the robot description file, it is a common practice to use external mesh files, in formats such as DAE (Collada) or STL, to represent the visual and collision shapes of the robot.
Robot models are typically available in packages that include the robot description file and additional geometry files with visualizations and collision shapes, either as primitive geometries or external mesh files. These packages may be distributed as ROS workspaces, which are more straightforward to use in ROS applications.
Introduction to Robot Importer
Import robots into your O3DE simulation project using the Robot Importer that’s included in the ROS 2 Gem. Robot Importer has the following features:
- Guides you through the import process step by step.
- Allows you to change parameters of the import, including search paths for assets.
- Reads SDFormat, URDF and XACRO files.
- Copies all required assets files to the
Assetsfolder of your O3DE project. - Creates a prefab with a multi-body structure using articulations or classic rigid bodies and joints components.
Importing a robot into your simulation project
Prerequisite
Depending on a content of robot description files, you might need to build a ROS workspace with the package and its dependencies. This ensures that Robot Importer can find all the required files. In some cases, it is possible to append paths used by the Robot Importer in the Wizard instead, and to skip the build of a ROS workspace completely.
To build, create a workspace and run colcon build. Do not forget to source ROS 2 workspace before launching the O3DE Editor.
For more information, refer to the robot description package’s documentation, which is often included in the GitHub repository’s README file.
Loading the robot definition file with Robot Importer
Load your project and select a level in O3DE Editor.
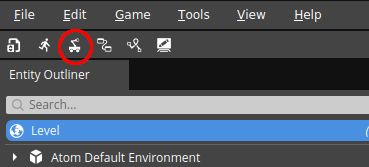
Launch Robot Importer from the Editor by doing either of the following:
Select Main Menu > Tools > Robot Importer
Select the Robot Importer icon in the toolbar
Read the information page in the Robot Importer. Then select Next.
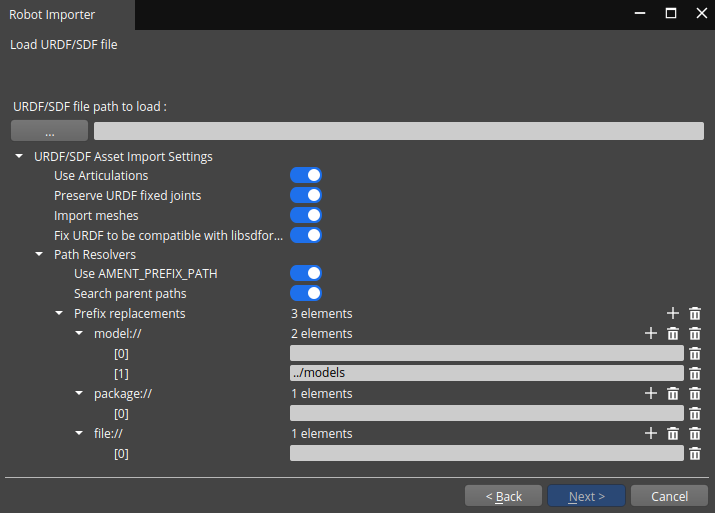
Load a description file by doing the following:
- Select an SDFormat, URDF, or XACRO file to import by clicking on the […] button.
- A number of options are available to modify the behavior of the importer:
- Use Articulations - Determines whether PhysX articulation components should be used for joints and rigid bodies.
- Preserve URDF fixed joint - When set, preserves any fixed joints found when importing a URDF file. This prevents the joint reduction logic in libsdformat from merging links of those joints.
- Fix URDF to be compatible with libsdformat - It allows you to import some URDFs or XACRO files that are not fully compatible. With this feature enabled, Robot Importer will try to adjust the URDF code to be compatible.
- Path Resolvers - SDFormat, URDF, and XACRO files are almost always referencing some other files (like meshes, and textures). This feature allows you to give a hint to Robot Importer where to find those assets.
This feature can be useful, in an advanced situation like importing legacy files or trying to import ROS 1 packages.
Important This feature does not affect the XACRO parsing, since the XACRO bundled with ROS 2 installation is used at this moment. - Use
AMENT_PREFIX_PATH- Uses the AMENT_PREFIX_PATH environment variable to locate asset references. It is a default behavior for ROS 2 description packages. - Prefix Replacement - This is a map that allows you to determine paths for the Path Resolvers, described earlier.
- Click Next.
(Optional) If you are importing an XACRO file which file contains parameters, set the parameters’ values. To edit parameters, double-click on the value. When you’re finished, click Next.
 Note:
Note:How you set the parameters depends on the XACRO project that you are importing. For a successful import, refer to the XACRO project’s documentation.
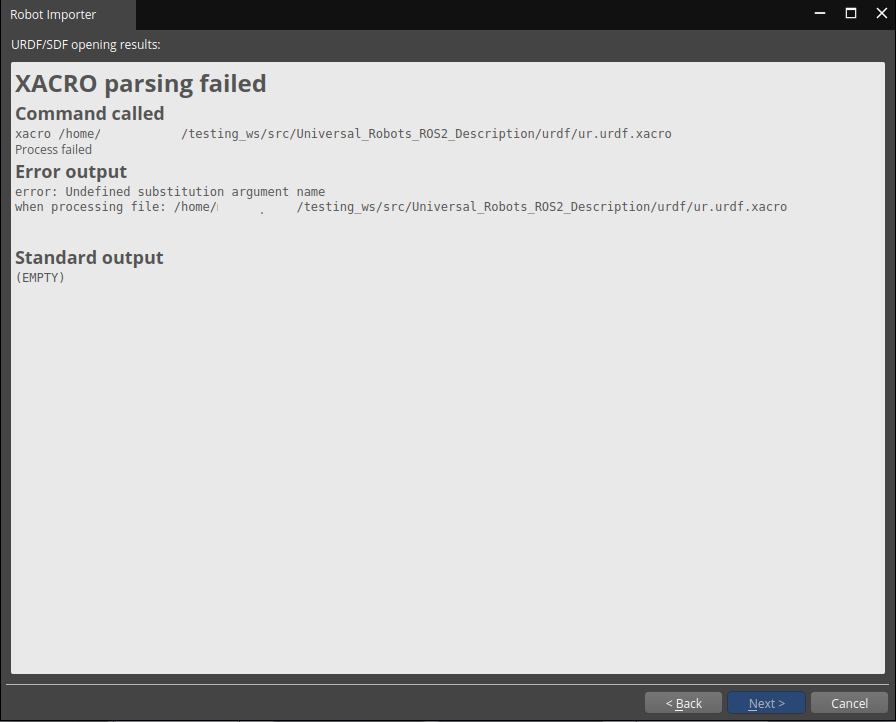
If your XACRO project fails to import, you will see a message with the output of the ROS 2 XACRO executable, similar to the following.
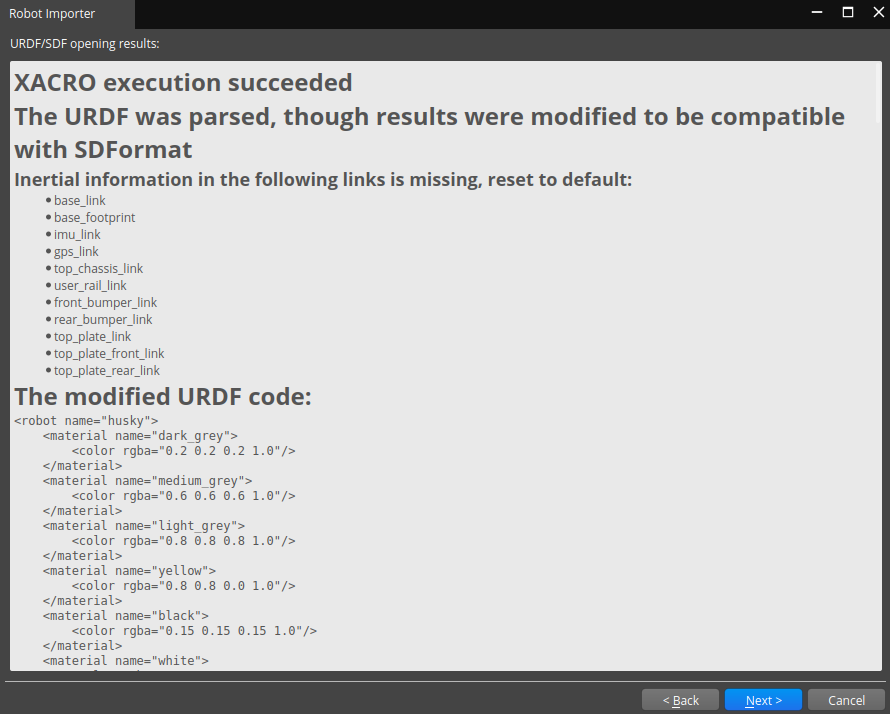
(Optional) If the XACRO or URDF contains some missing information will be adjusted automatically. This feature is available if you enable the option ‘Fix URDF to be compatible with libsdformat’ in point 4. Currently, some common problems are resolved:
missing inertia matrices, masses are added with the default values,
Robot Importer changes names to have joint names unique. After this automatic adjustment, you can take a look into the changes that were made, and go through the modified URDF.
 Note:Option ‘Fix URDF to be compatible with libsdformat’ allows you to successfully import URDF files that are not compatible with simulation, but please remember to adjust the resulting prefab.
Processing robot assets
After the the description file loads, Robot Importer displays a table with a list of all the assets used in the model. Each row of the table describes one asset, with information divided into the following columns:
URDF/SDF mesh path - Relative file path of the mesh, as defined in the URDF file.
Resolved mesh from URDF/SDF - Absolute file path of the mesh located in your filesystem.
Product asset - Relative file path of the generated product asset (e.g.
*.azmodel,*.pxmesh) in your O3DE project’sCachedirectory.Source asset - Relative file path of the source asset in your O3DE project’s
Assetsdirectory.Type - The type of the asset.
Assets that loaded successfully have a green checkmark, whereas assets that failed to load are marked red.
To see additional information about each asset, double-click its row. This opens the O3DE Asset Processor, which shows import details. This information is especially helpful to troubleshoot assets that failed to import.
Click Next when finished.
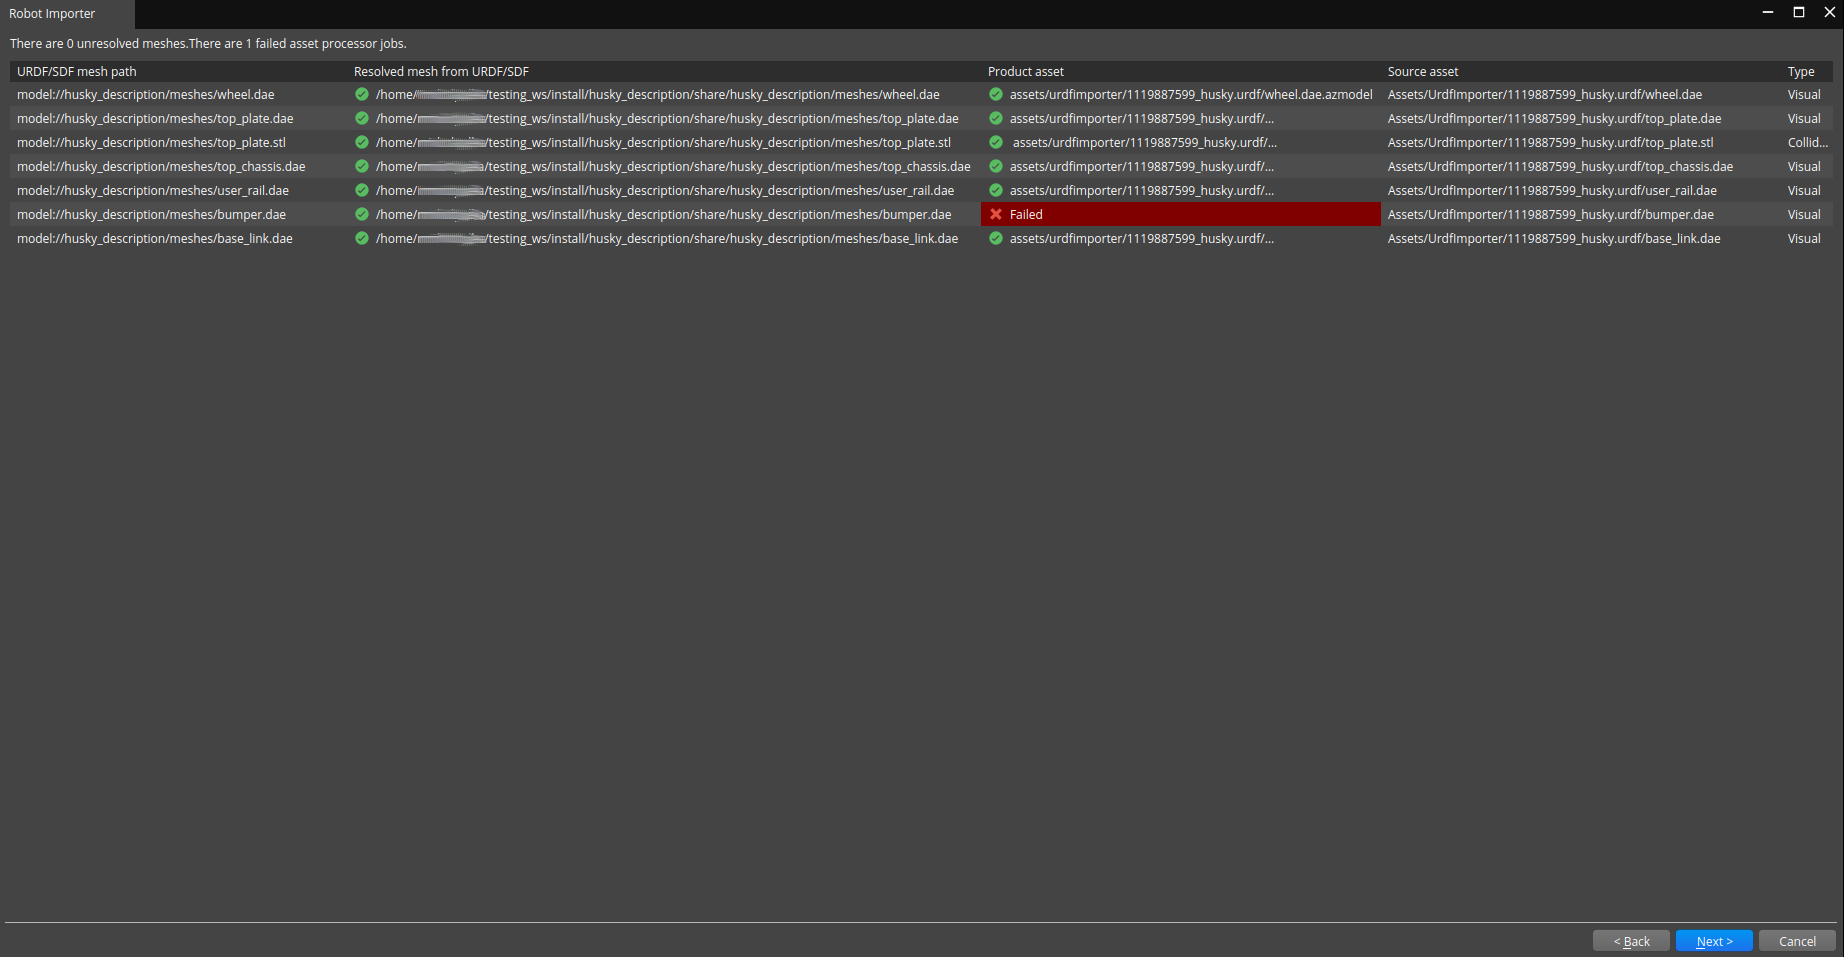
What to do if there are problems with importing assets?
If the Source asset field is marked as failed, then Robot Importer cannot find a reference to the mesh file in the file system. In such a situation, ensure that the robot’s description package is built and sourced correctly. You can try to give a custom way to resolve prefixes in Point 4.
If the Product asset field is marked as failed, then the Asset Builder cannot build the product asset.
Refer to the Asset Processor output or the log files in the /user/log directory.
You can either resolve the issues now or after you finish using Robot Importer:
- To resolve, click Back and resolve problems with the mesh files. Then click Next to retry the import.
- To resolve later, click Next and finish URDF import. Then add the missing meshes in the O3DE Editor.
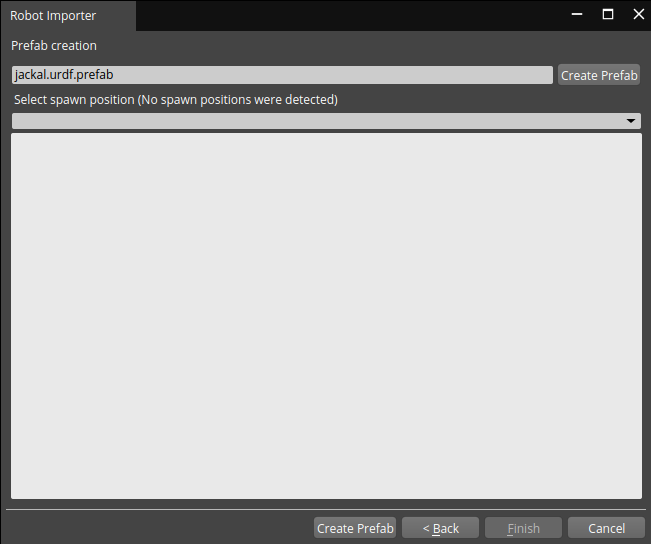
Creating a robot prefab
Create a prefab by doing the following:
- Enter a prefab name.
- (Optional) Select a spawn position. If there are spawn points added to the scene, you can choose one in the drop-down menu.
- Click Create Prefab.
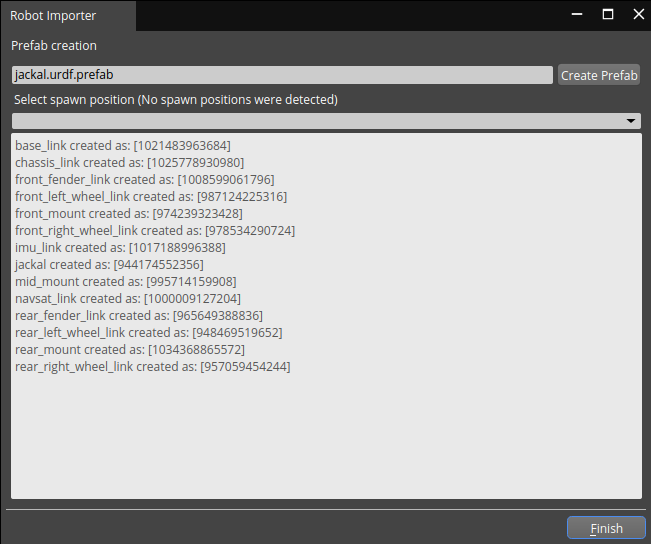
After creating a prefab, review a summary of the generated entities.
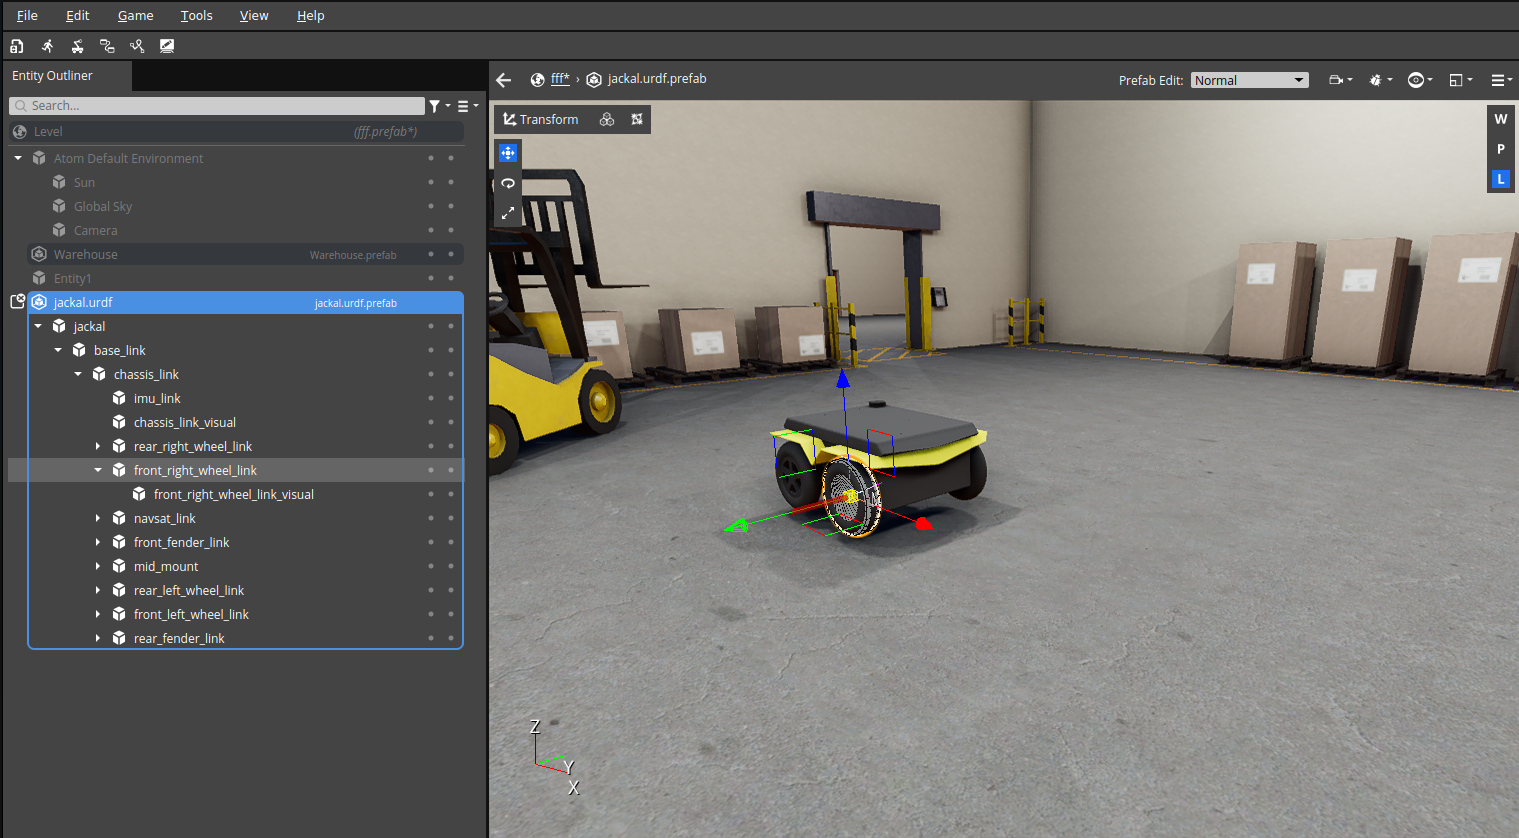
Finally, there is a prefab in the scene. You can add one or more sensors or mobilize robot with ROS 2 Vehicle Dynamics or using Joint Manipulation.
Re-importing robots
Use the Robot Importer to re-import URDF files. In some cases, assets (mesh files) don’t update if they were previously imported correctly. To work around this and do a complete re-import, delete the assets from your project by using the Asset Browser or in the directory.
More information
Details about supported SDFormat sensors are available in the SDFormat sensors sub-page. Additional information about SDFormat model plugins are given in the SDFormat plugins sub-page. You might be interested in checking a more thorough import description of Turtlebot4 robot in the Importing Turtlebot4 sub-page.