IN THIS ARTICLE
Manual export O3DE Atom Sampleviewer for iOS
This guide covers how to manually build and deploy games on iOS. First, we will generate an Xcode project and prepare assets. Afterwards we will walk through how to ensure Xcode is properly setup to build an iOS app.
For this demonstration, we will use the O3DE Atom Sample Viewer project as our reference point for ensuring proper behavior. Results may vary for other projects.
Note:To learn more about the project export tooling, please consult the page Project Export CLI Tool.
Important:The iOS export functionality is only available on macOS, which is currently experimental for O3DE.
Prerequisites
- Git clone O3DE Atom Sample Viewer project onto your machine.
- Register O3DE Atom Sample Viewer project with O3DE. You can register the project using:
<O3DE_ENGINE>/scripts/o3de.sh register -pp /path/to/o3de-atom-sampleviewer
- Have a valid copy of Xcode installed on your machine, and a valid Apple Developer ID associated with that IDE. To set up such an ID, go to
developer.apple.com . To use your desired Apple ID, in Xcode go to
Xcode -> Settings. In the Settings window, go to the Accounts tab and click the ‘+’ icon at the bottom of the left panel to add your account. Select Apple ID to proceed, and follow on-screen instructions. - You will also need to ensure that Xcode has the standard SDKs installed for macOS and iOS, and that your preferred iOS test device is compatible with Xcode. If you are not sure, you can consult this page on installing Simulator Runtimes .
- Make sure the o3de engine bootstrap registry is enabled for ios. To do so, go to your O3DE engine installation and edit the file at
$O3DE_ENGINE_PATH/Registry/bootstrap.setregso that theassetsfield usesios. Like so:
"assets": "ios",
- Edit the
$O3DE_ENGINE_PATH/Registry/AssetProcessorPlatformConfig.setregfile at line 67 by uncommenting the line:
//"ios": "enabled", -> "ios": "enabled",
This will tell the asset processor to make sure ios assets are cached when building the project.
Export Process
Running the Export Commands
Assuming you are just following along using the O3DE Atom Sampleviewer project, these commands should be all you need to generate the necessary Xcode project file in the project’s build folder:
export PROJECT_PATH=/path/to/project
cd $PROJECT_PATH

# Build the o3de tools if you haven't already, otherwise use tools you already have
cmake -B build/tools -G "Xcode"
cmake --build build/tools --target Editor AssetProcessor AssetBundler AssetProcessorBatch AssetBundlerBatch --config profile

# Run the asset processor
./build/tools/bin/profile/AssetProcessorBatch --platforms=ios --project-path $PROJECT_PATH

# Generate the Xcode project
cmake -B build/game-ios -G "Xcode" -DCMAKE_TOOLCHAIN_FILE=$O3DE_PATH/cmake/Platform/iOS/Toolchain_ios.cmake -DLY_MONOLITHIC_GAME=1
Note:Make sure the$O3DE_ENGINE_PATHvariable is set to the absolute path to the location of the O3DE source and$PROJECT_PATHis set to the absolute path to the location of your project folder.
Note:The O3DE Atom Sampleviewer project is not intended to be exported for release and pak configurations. It’s a developmental showcase of the atom renderer features. As such, exporting for release is not supported for this project. To use the asset bundler for Pak files, please use another project.
Assuming the underlying CMake build system finds no issues with your engine or project installation, you should have the corresponding Xcode project file, which will be located at $PROJECT_PATH/build/game_ios. For the Atom SampleViewer, it should be called AtomSampleViewer.xcodeproj.
Using Xcode
Double click the file AtomSampleViewer.xcodeproj to open it in Xcode. This should load everything needed to build the app on an iOS device.
Deploying to an iOS device requires code-signing. Make sure that you have a provisioning profile setup for code-signing.
Next, we’ll open the project configuration details. Click on the AtomSampleViewer project icon in the Explorer tree-view (left hand side of the Xcode IDE). On the left column under “General”, select the build configuration AtomSampleViewer.GameLauncher. The resulting configuration page should look like this:
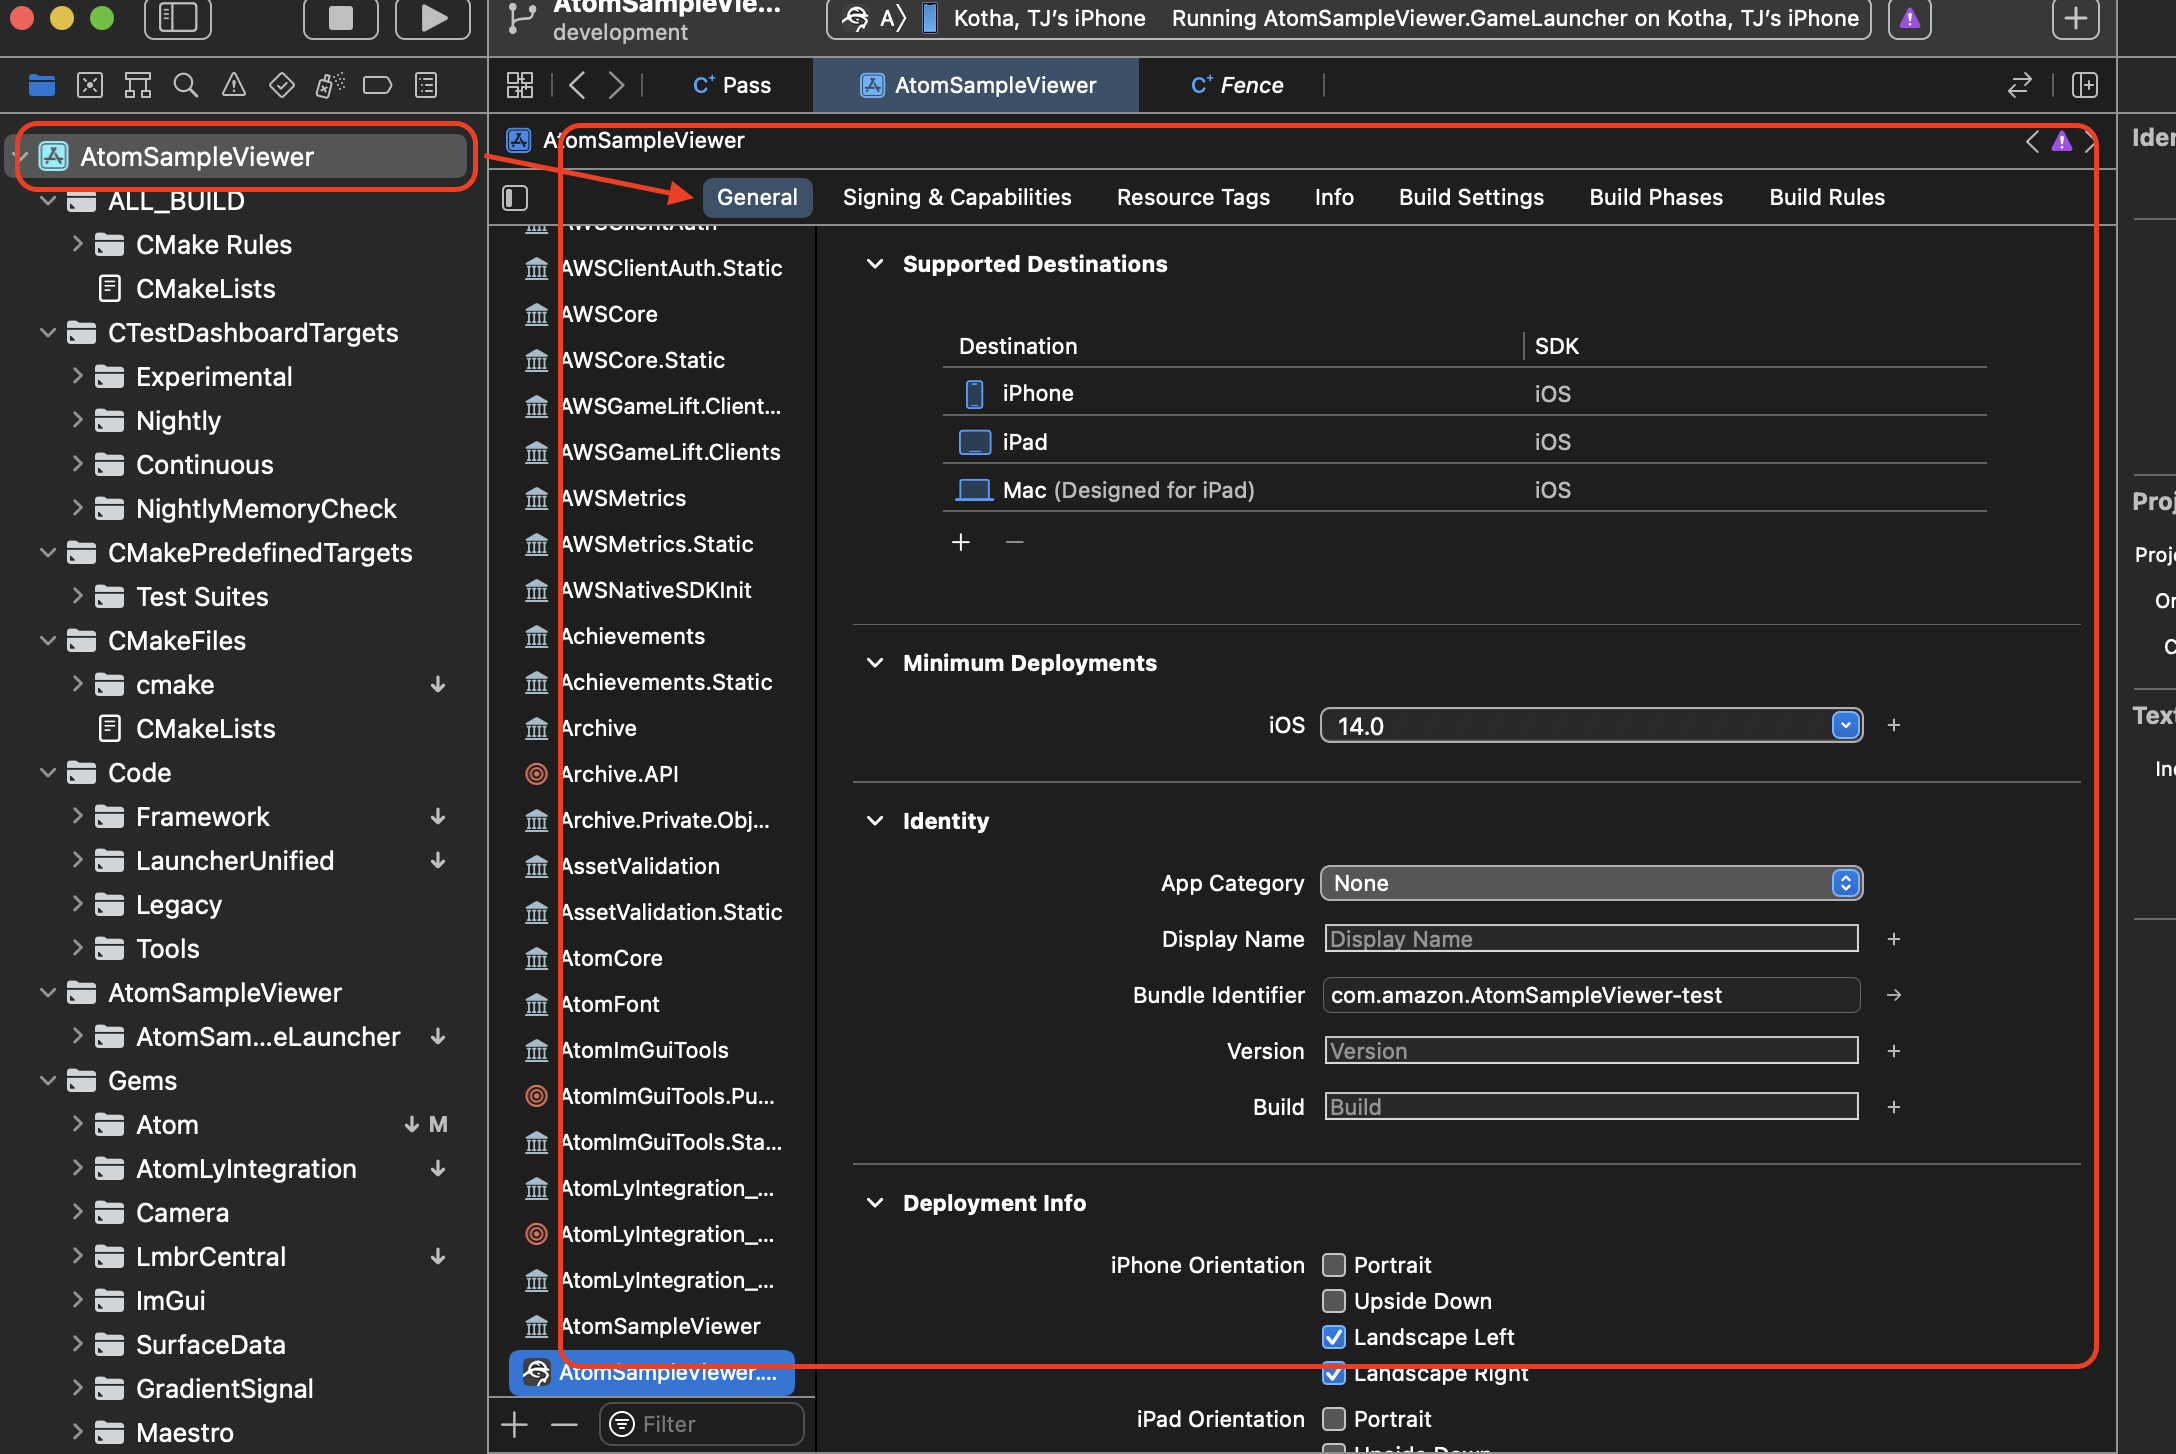
Go to the “signing and capabilities” tab and setup the provisioning profile to link to your Apple ID. Customize the bundle identifier (add any string you want, for example: append the phrase ’test’). Enable “Automatically manage signing.”

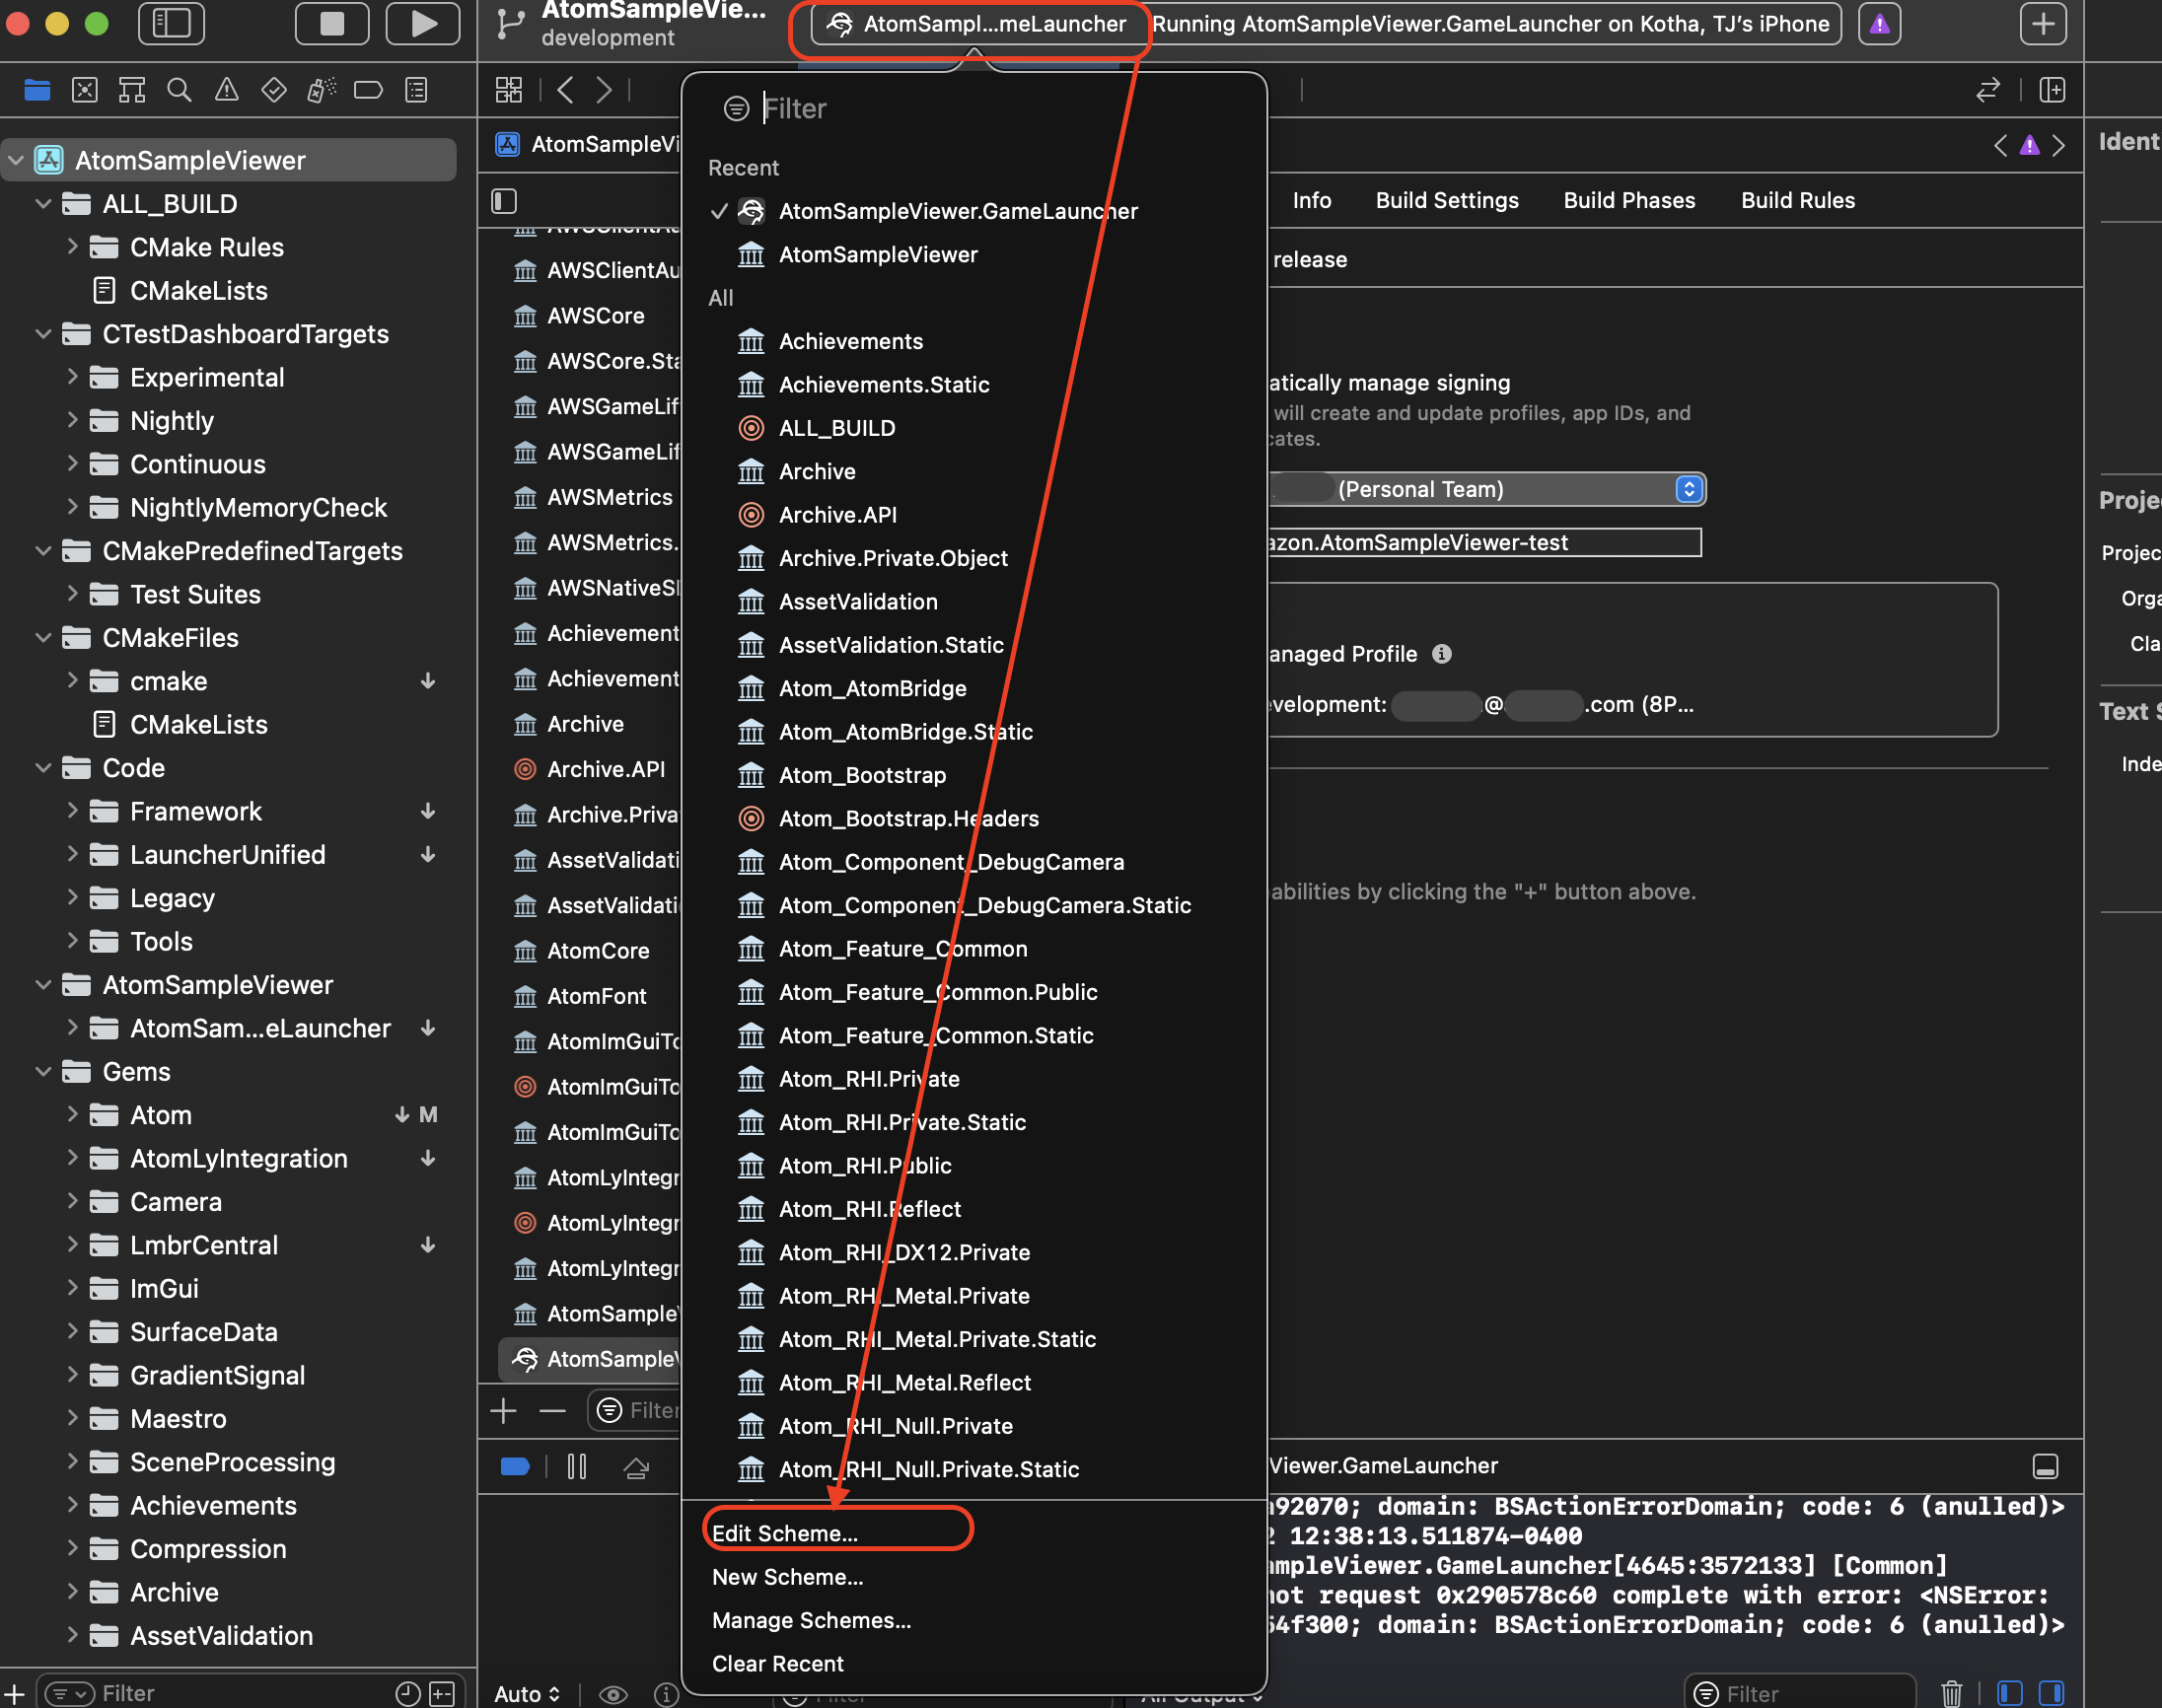
Click on the bar in the region labeled “AtomSampleViewer.GameLauncher” and scroll through the drop down to click “Edit Scheme.”
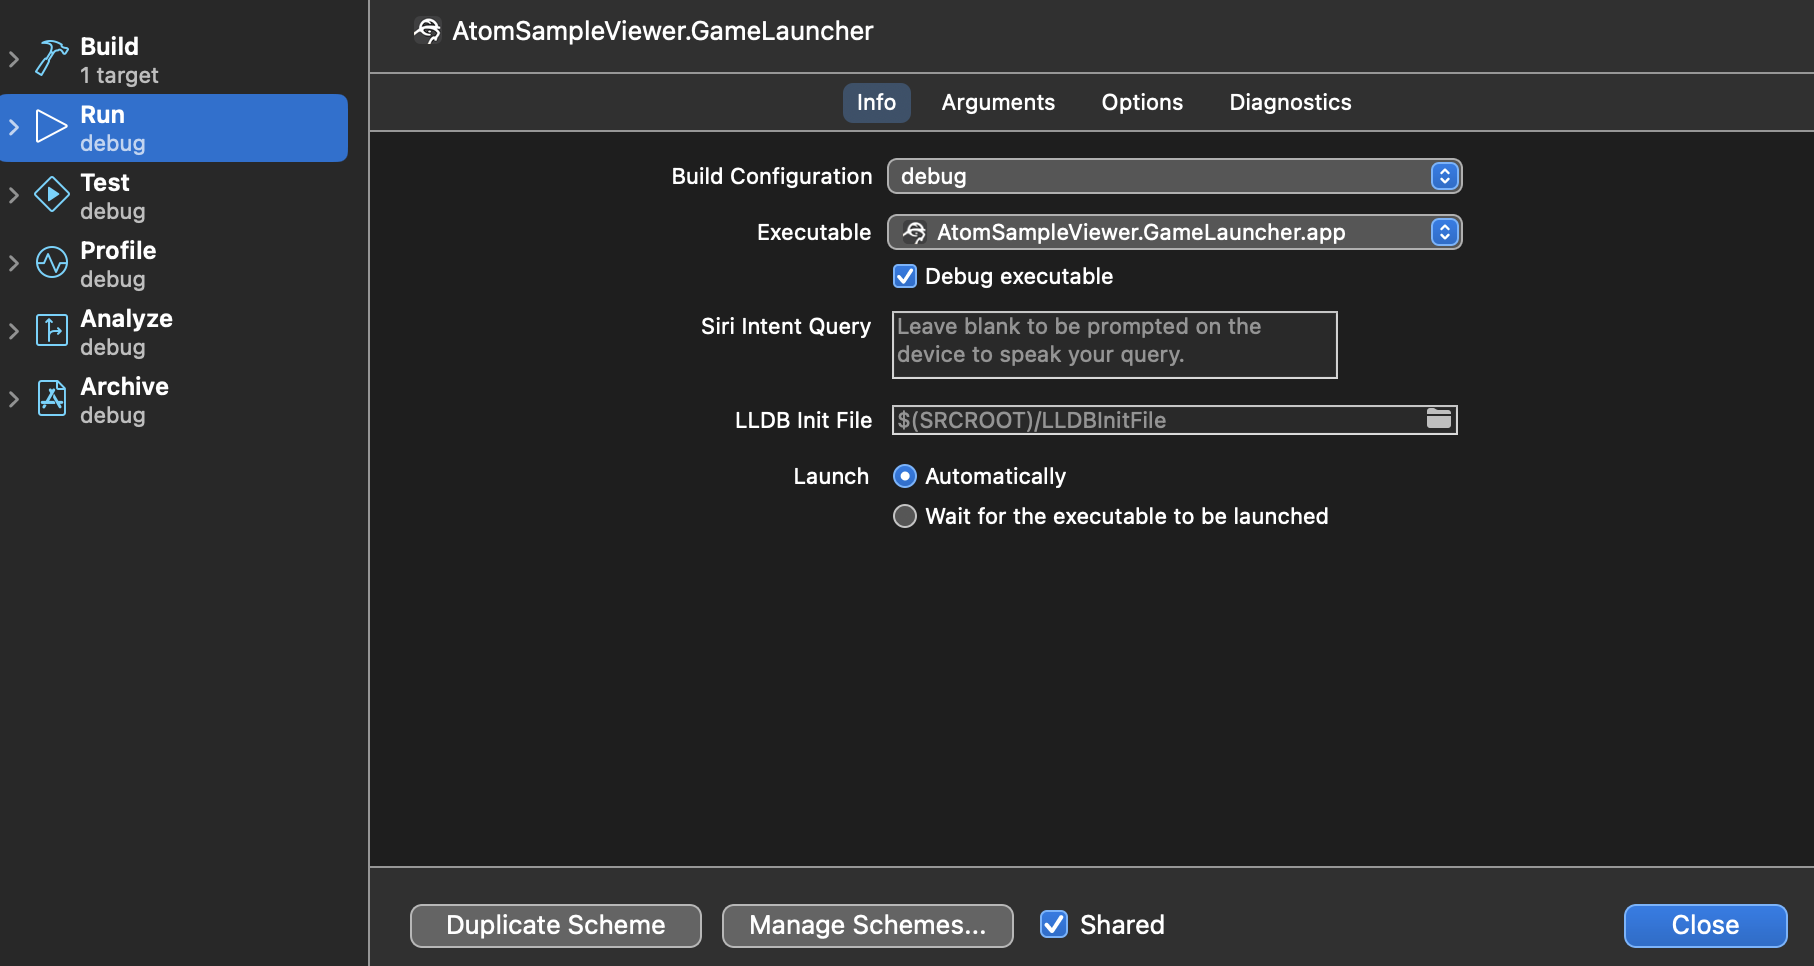
Set the desired build configuration and set the relevant CLI parameters in the arguments section. An example configuration is shown below:
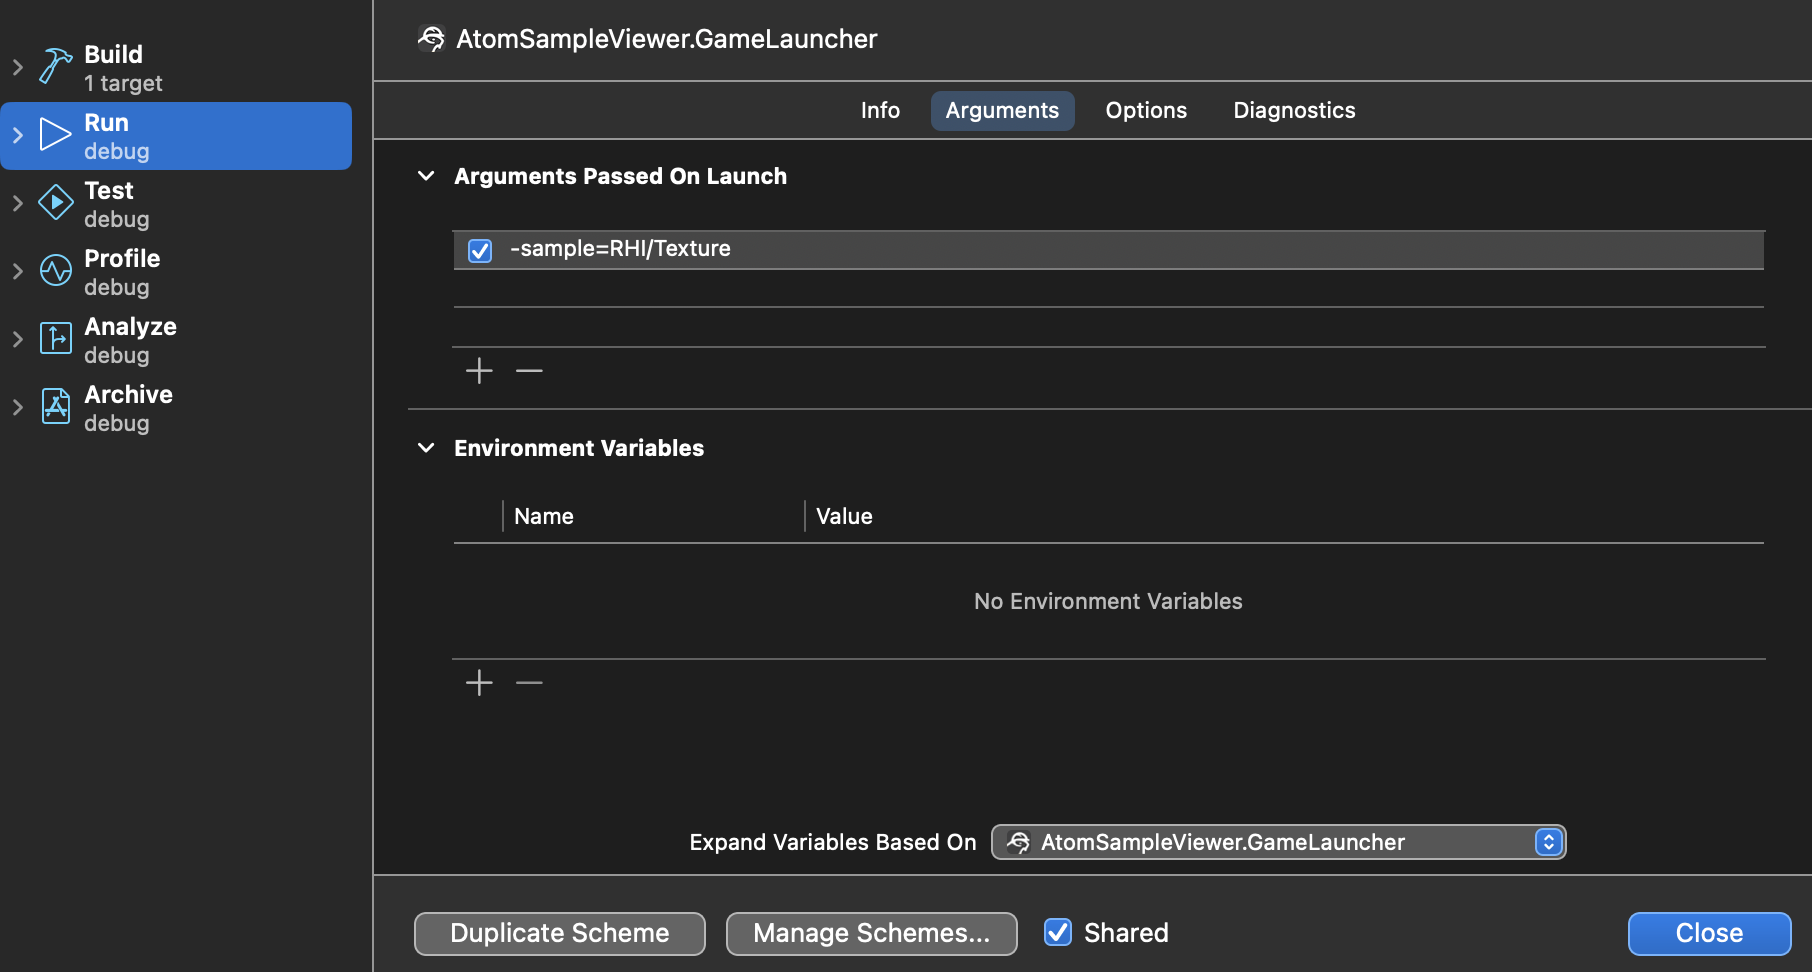
Note:For CLI paramter settings that you would like to persist over multiple exports, you can specify the commands to run on launch for a release build via code or by using theautoexec.client.setreg. You can find an example of this in Set the starting level.
Make sure to connect your iOS device to the computer. Xcode should recognize your device, and it should be compatible with the project. If not, follow the Xcode error prompts to trouble shoot the issue and updating may be required. Once this is all correct, press the play button to build and deploy the project.
If the build and deployment successfully completes (assuming you used the sample configuration), you should get the following on your iOS device: