IN THIS ARTICLE
Creating a Project Game Release Layout for Windows
This tutorial guides you through the process of creating an Open 3D Engine (O3DE) project game release layout manually for Windows computers. A project game release layout is a directory structure that contains the Game Launcher and the bundled assets needed to run the Game Launcher outside of the developer environment. You create a project game release layout when you build your project for release, known as a release build.
Note:If you wish to use the engine from source instead of the installer, please refer to Setting up O3DE from GitHub. Also, you must use a project-centric configuration, which is detailed further below.
A release build requires bundled content, which includes cached product assets stored in package (.pak) files. Cached product assets are located in the project’s Cache\pc directory. The Game Launcher loads the bundled content that makes up a project, such as its levels, objects, environments, and gameplay logic.
The instructions here guide you through the following steps:
Set the starting level.
Process your project’s assets.
Create a project game release layout.
Bundle your project’s assets.
Run your project’s Game Launcher from the project game release layout.
Distribute your build.
Prerequisites
The following instructions assume that you have:
Set up O3DE on your computer as either a source engine or pre-built/installed SDK engine. For help, refer to Building for Windows.
Created an O3DE project that contains at least one level. To build your project for release, you might need to resolve any errors in your project.
Generated a Visual Studio project for either of the following:
Your project – If you’re using a source engine, you must generate a Visual Studio project for your project. For help, refer to Create a Visual Studio project.
Your engine – If you’re using a pre-built SDK engine, you must generate a Visual Studio project for your engine. For help, refer to the first step in building the INSTALL target under the topic of Engine and Project Distribution.
Registered your project to your engine.
Tutorial specifics
This tutorial uses the following directories in the examples.
- Project name and directory:
C:\MyProject - Third-party directory:
C:\o3de-packages - Source engine:
C:\o3de - Pre-built SDK engine:
C:\o3de-install
Set the starting level
Note:This step is optional if you set the starting level in your project’s code base. A more common practice in development is to set the starting level in the project’s code base via a level manager or similar system.
Prerequisite: You must have created at least one level in your project. Check out the Create a level tutorial to start.
Before you create a project game release layout, your project must specify a starting level to inform the Game Launcher which level it should load first. You can specify the starting level in your project’s settings registry (.setreg) or in your project’s code base via a level manager or similar system that your team develops.
For this example, set your project’s starting level in the settings registry by creating an autoexec.game.setreg file in the C:\MyProject\Registry directory. Then, add the following lines.
{
    "O3DE": {
        "Autoexec": {
            "ConsoleCommands": {
                "LoadLevel": "mainmenu"
            }
        }
    }
}
This configuration specifies the starting level by setting Loadlevel to the name of the level. For this example, the level asset is named mainmenu. You don’t need to specify the level asset’s file extension, such as main.prefab or main.spawnable. You can find your project’s levels in the C:\MyProject\Levels directory.
Process assets
Use Asset Processor or the Asset Processor Batch program to process source assets into product assets, which the Game Launcher consumes at runtime. Asset Processor provides a graphical user interface (GUI), while Asset Processor Batch provides a command line interface (CLI).
Methods to process assets
To process your project’s assets, do one of the following:
Run Asset Processor. Do this if you already built Asset Processor and prefer to use a GUI.
Run
AssetProcessor.exefrom the build directory based on your engine type.<project>/build/windows/bin/profile– For source engine.<engine>/build/windows/bin/profile– For pre-built SDK engine.
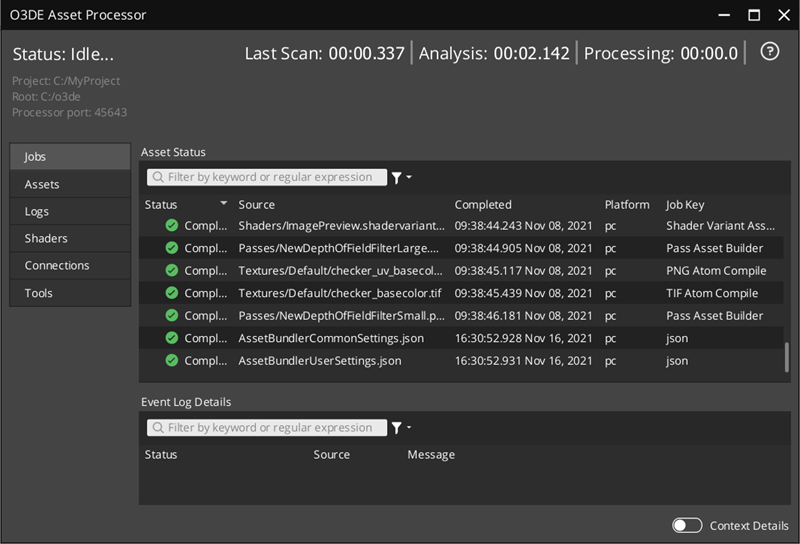
Wait for all jobs to complete. You can view the status of each asset in the Asset Status pane and the details of each asset in the Event Log Details pane.
Run Asset Processor Batch. Do this if you already built Asset Processor and prefer to use a CLI.
Run
AssetProcessorBatch.exefrom the build directory based on your engine type.<project>/build/windows/bin/profile– For source engine.<engine>/build/windows/bin/profile– For pre-built SDK engine.
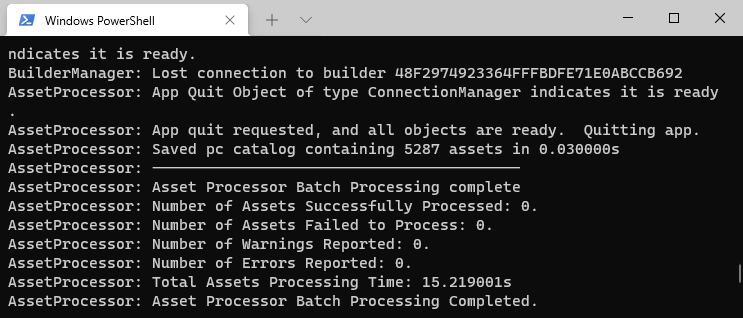
Wait for all jobs to complete. You can view the output in the
AP_Batch.logfile in the<project>\user\logdirectory.
Build your project’s Asset Processor tools. Do this if you have not yet built Asset Processor and Asset Processor Batch.
Use CMake to invoke Visual Studio to build the Asset Processor tools and their dependencies. Specify the
MyProject.Assetstarget.cmake --build build\windows --target MyProject.Assets --config profile -- -mFirst, this command builds the Asset Processor tools. Then, it runs Asset Processor Batch and processes the assets. You don’t need to rerun Asset Processor or Asset Processor Batch unless you make changes in your project.
Wait for all jobs to complete. You can view the output in the
AP_Batch.logfile in the<project>\user\logdirectory.
Verify assets are successfully processed
Verify that Asset Processor successfully processed your assets by checking their status. Asset Processor can process your assets with or without warning or error, or they can fail to process. Warnings and errors indicate that your asset may need your attention, but they don’t impede the ability to create a project game release layout. On the other hand, it’s critical that you resolve any assets that were not processed due to failure.
For help with troubleshooting failures, refer to Troubleshooting Packaging in O3DE.
Create a project game release layout
Now that you’ve prepared your project, you can create a project game release layout. You can do this in different ways, depending on how you set up your engine and whether you want to create a non-monolithic or monolithic release build.
When you set up O3DE, you built your engine as either a source engine or a pre-built SDK engine. You can use either build type to create a project game release layout. For more information on build types, refer to Build the engine.
Additionally, you can create a project game release layout that’s either non-monolithic or monolithic. A non-monolithic build uses Gems as dynamically linked libraries (.dll), whereas a monolithic build uses Gems as statically linked libraries (.lib). Using Gems as .lib files in a monolithic build strips out unused pieces of code and removes redundant symbols across them. As a result, the total space on disk for a monolithic build is smaller than for a non-monolithic build.
Note:The final output of a monolithic build might contain some.dllfiles. This can occur when third-party libraries provide only.dllfiles.
In this step, you use CMake to build either a non-monolithic or a monolithic project for release. This handles several tasks:
Creates an install directory that contains the project game release layout. By default, the install directory is located in your project’s directory (for example,
C:\MyProject\install). Alternatively, you can set the install directory to another location by settingCMAKE_INSTALL_PREFIXin theCMakeCache.txtfile in the<project>\build\<build>directory (for example,C:\MyProject\build\windows\CMakeCache.txt).Bundles your game content by packaging all of the product assets in the
<project>\Cache\pcdirectory into anengine.pakfile.Builds the Game Launcher and other supporting files in the project game release layout.
Source engine
With a source engine, you must use a project-centric configuration to create a project game release layout. In a project-centric configuration, the CMake source directory is in the project build directory. So O3DE executables (for example, O3DE Editor, Asset Processor, and Game Launcher) are located in your <project>\build directory.
Now, you will choose a build type for your project game release layout.
Option 1: Monolithic (Game only)
The most common workflow is to release your game only, in which case you should choose the monolithic build. This will build only your game/server launcher and any necessary dependencies.
Use CMake to create a Visual Studio project for a monolithic project. Specify a new CMake build directory (
build\windows_mono) in your project directory to separate it from your non-monolithic build directory. Specify a monolithic build by enabling the-Doption toLY_MONOLITHIC_GAME.cd C:\MyProject cmake -B build\windows_mono -S . -G "Visual Studio 16" -DLY_3RDPARTY_PATH=C:\o3de-packages -DLY_MONOLITHIC_GAME=1Note: Use
Visual Studio 16as the generator for Visual Studio 2019, andVisual Studio 17for Visual Studio 2022. For a complete list of common generators for each supported platform, refer to Configuring projects.To build your monolithic project for release, use CMake to invoke Visual Studio builder. Specify the
installtarget andreleaseconfiguration.cd C:\MyProject cmake --build build\windows_mono --target install --config releaseThis command generates a Game Launcher and dependent
.libfiles. It also bundles your project’s product assets that are located in<project>\Cache\pcinto anengine.pakfile.
The result is a project game release layout in the install directory that’s located at <install>\bin\Windows\release\Monolithic. In your project game release layout, your engine.pak file is located in Cache\pc.
Your release build is now complete! Next, you need to bundle your content.
Option 2: Non-monolithic (Game + Editor/Tools)
The other option is to release your game plus the O3DE Editor and all of its tools, which is is a non-monolithic build. This is not recommended since the size of all these tools combined will be much larger than the monolithic build.
Building from a source engine supports non-monolithic projects by default. As detailed in Prerequisites, you should have already created a Visual Studio project for your project and registered your project to your engine.
To build your non-monolithic project for release, use CMake to invoke Visual Studio MSBuild. Specify the install target and release configuration.
cd C:\MyProject
cmake --build build\windows --target install --config release
You can specify a particular non-monolithic build by appending the option -DLY_MONOLITHIC_GAME=0. This command generates O3DE tools (such as Editor, Asset Processor, Game Launcher, and Server Launcher) and dependent .dll files. It also bundles your project’s product assets that are located in <project>\Cache\pc into an engine.pak file.
The result is a project game release layout in the install directory that’s located at <install>\bin\Windows\release\Default. In your project game release layout, your engine.pak file is located in Cache\pc.
Your release build is now complete! Next, you need to bundle your content.
Pre-built SDK engine
With a pre-built SDK engine, to create a project game release layout, you must append non-monolithic or monolithic artifacts.
Verify that your project is registered to your pre-built SDK engine by checking your project’s project.json file. To register your project, use O3DE CLI from your pre-built SDK engine.
cd C:\o3de-install
scripts\o3de.bat register --project-path C:\o3de-projects\MyProject
Now, you will choose a build type for your project game release layout.
Option 1: Monolithic (Game only)
The most common workflow is to release your game only, in which case you should choose the monolithic build. This will build only your game/server launcher and any necessary dependencies.
First, we need to build the monolithic artifacts in your SDK engine layout. Specify a new CMake build directory (
build\windows_mono) in your pre-built SDK engine directory, separate from your non-monolithic build directory. Specify a monolithic build by enabling the-Doption,LY_MONOLITHIC_GAME.cd C:\o3de cmake --preset windows-mono-default -DO3DE_INSTALL_ENGINE_NAME=o3de-install
Note:UseVisual Studio 16as the generator for Visual Studio 2019, andVisual Studio 17for Visual Studio 2022. For a complete list of common generators for each supported platform, refer to Configuring projects.
In your source engine, use CMake to invoke Visual Studio to append non-monolithic release artifacts to the pre-built SDK layout.
cd C:\o3de
cmake --build --preset windows-mono-install --config release
Now that the monolithic build artifacts have been added to the SDK engine layout, your project can configure against that layout to run a monolithic build. Switch to your project’s source directory and use CMake to create a Visual Studio project for your project that builds against the monolithic engine.
cd C:\MyProject
cmake --B build\windows_mono -S . -DCMAKE_INSTALL_PREFIX=C:\MyProject\MyProjectGameLayout -DLY_MONOLITHIC_GAME=1
Finally, invoke the CMake build wrapper to build the project game release layout using the
installtarget.This command generates a Game Launcher and dependent
.libfiles. It also bundles your project’s product assets that are located in<project>\Cache\pcinto anengine.pakfile.
The result is a project game release layout in the install directory that’s located at <install>\bin\Windows\release\Monolithic. In your project game release layout, your engine.pak file is located in Cache\pc.
Your release build is now complete! Next, you need to bundle your content.
Option 2: Non-monolithic (Game + Editor/Tools)
The other option is to release your game plus the O3DE Editor and all of its tools, which is is a non-monolithic build. This is not recommended since the size of all these tools combined will be much larger than the monolithic build.
A pre-built SDK engine supports non-monolithic projects by default. As detailed in Prerequisites, you should have already created a Visual Studio project for the engine and registered the engine.
Use CMake to create a Visual Studio project for your SDK engine to support a non-monolithic project.
cd C:\o3de
cmake --preset windows-default -DO3DE_INSTALL_ENGINE_NAME=o3de-install
Note: Use
Visual Studio 16as the generator for Visual Studio 2019, andVisual Studio 17for Visual Studio 2022. For a complete list of common generators for each supported platform, refer to Configuring projects.In your source engine, use CMake to invoke Visual Studio to append non-monolithic release artifacts to the pre-built SDK layout.
cd C:\o3de
cmake --build --preset windows-install --config release
You can specify a particular non-monolithic build by appending the option
-DLY_MONOLITHIC_GAME=0. This command generates O3DE tools (such as Editor, Asset Processor, and Game Launcher) and dependent.dllfiles. It also bundles your project’s product assets that are located in<project>\Cache\pcinto anengine.pakfile.
The result is a project game release layout in the install directory that’s located at <install>\bin\Windows\release\Default. In your project game release layout, your engine.pak file is located in Cache\pc.
Your release build is now complete! Next, you need to bundle your content.
Bundle content
Asset Bundler and the Asset Bundler Batch program are tools that let you create and optimize your bundled content. When you created a project game release layout earlier, you bundled all of your assets into an engine.pak file, which contains all of your project’s and then engine’s product assets. There are likely many unused assets from the engine, and your project may contain unused assets as well, so the engine.pak file might be much larger than it needs to be in order to run just your game. To optimize your bundled content, use Asset Bundler and configure how you want to bundle your assets.
Follow the instructions in
Bundling Assets for a Project Game Release Layout. Create two bundles. It’s strongly suggested you add an initial version number to the bundle filenames such as game_v1.pak, for game assets, and engine_v1.pak, for engine assets. You might have to create
content patch packages in the future if you add or update your project’s assets, or upgrade the engine. Adding a version number to the asset bundles simplifies the process. Then, add the bundles to your project game release layout.
You should notice that both your bundled assets combined are smaller than the default engine.pak that was created automatically when you created a project game release layout earlier.
License file generation
License attribution files (often called the NOTICES file) can be generated during the project development process to properly attribute any code or downloadable packages that were imported. To scan project and package directories for licenses, you can run a script located in the engine’s scripts\license_scanner subdirectory. This script will look for the PackageInfo.json file in order to create a summary file of all package licenses with SPDX tags for easy reference.
Refer to the instructions in Engine and Project Distribution for more details. Generally, you will copy the generated file to the root of your game release layout to properly attribute your dependencies.
Run the Game Launcher
Now you’re ready to run your project’s Game Launcher.
Run GameLauncher.exe from your project game release layout, which is located in the <install>\bin\Windows\release\<build> directory. For example, the path could be:
C:\MyProject\install\bin\Windows\release\Monolithic– For monolithic projects.C:\MyProject\install\bin\Windows\release\Default– For non-monolithic projects.
Distribute your build
To distribute your build to other Windows computers:
Create a
.zipfile of the<install>\bin\Windows\release\<build>folder. The contents of the.zipfile should look similar to this:Monolithic | DevTestProject.GameLauncher.exe | PhysXDevice64.dll | PhysXGpu_64.dll | \---Cache \---pc engine_v1.pakDistribute the
.zipfile using your preferred method, such as a file storage service.
Now others can download and unpack the .zip file and run the Game Launcher on their Windows computers.
Note:To run the Game Launcher on the other Windows computers, they must have the Microsoft Visual C++ (MSVC) Redistributable installed.