IN THIS ARTICLE
Grouping Nodes in Script Canvas
As your Script Canvas graphs grow in size, you can group nodes to logically organize parts of a script or reduce its visual complexity. Groups can be nested, named, and color-coded.
Creating and managing node groups
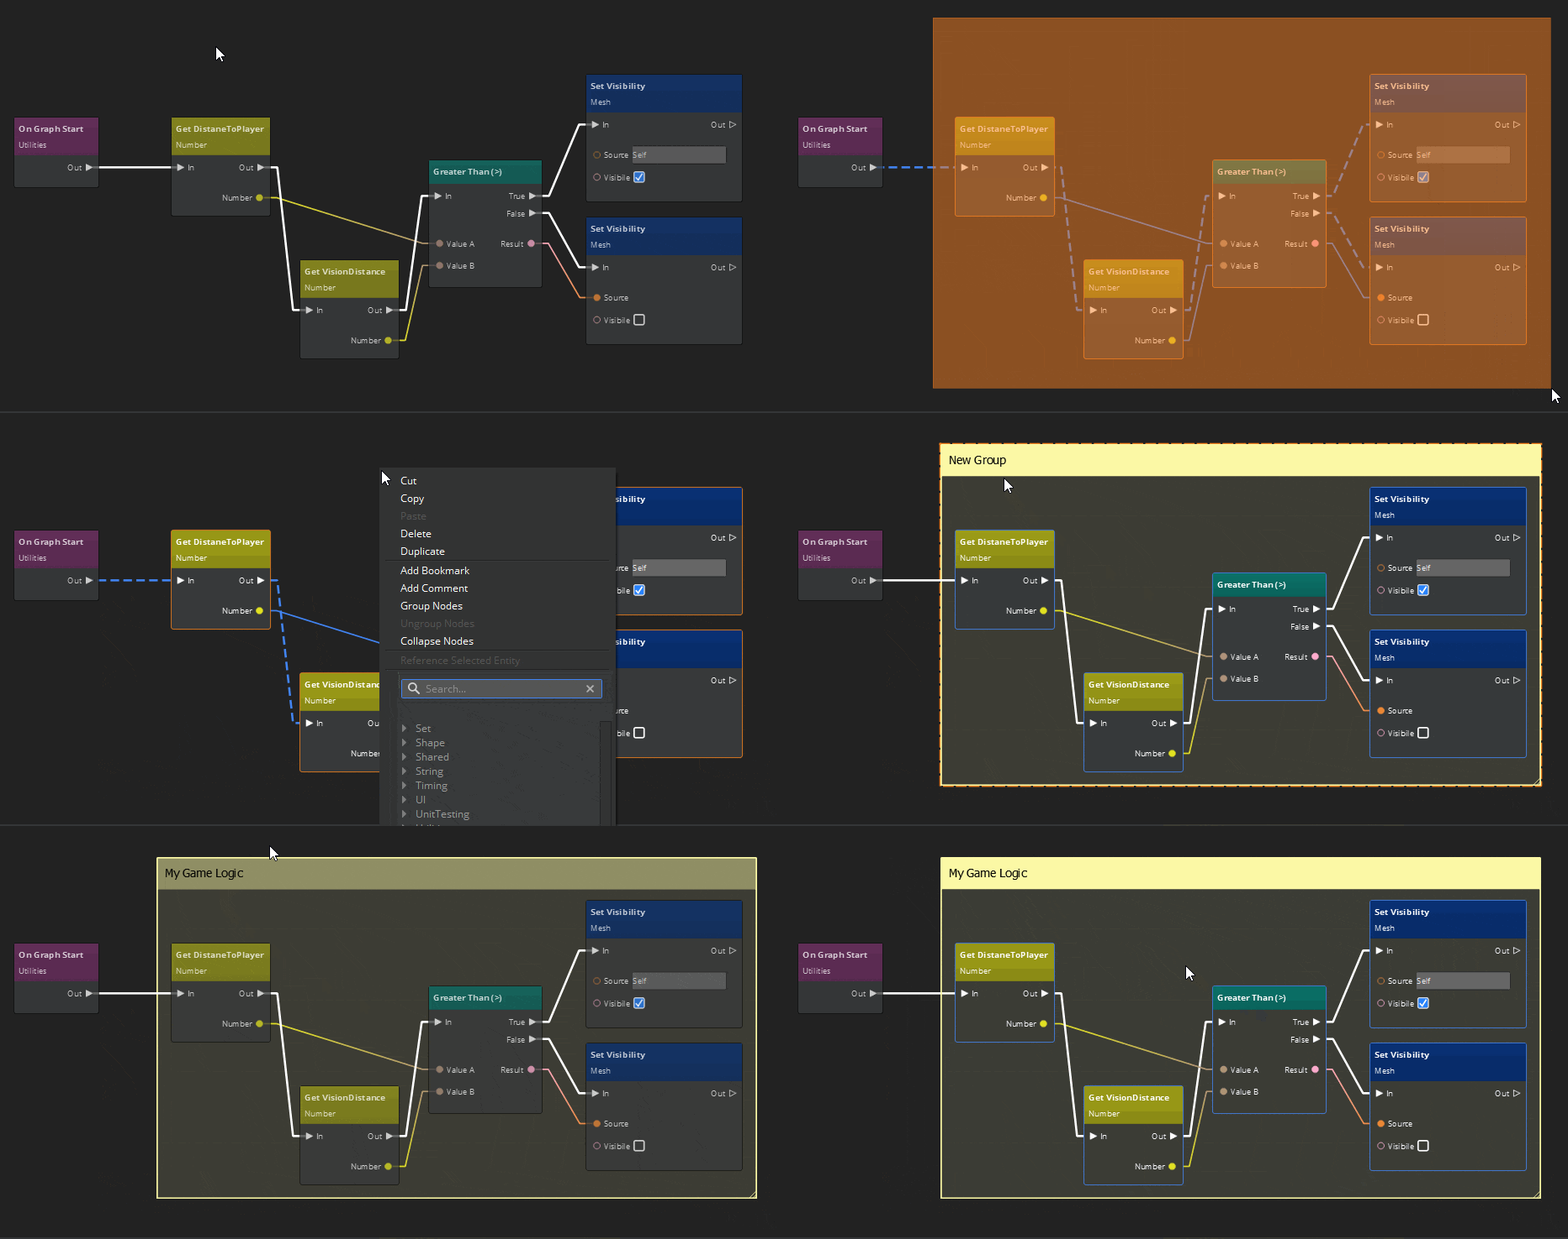
To create a node group from existing nodes and/or node groups
Select the nodes that you want to group.
Right-click the graph, choose Group, and then choose a group category.
Enter a name for the node group, and then press Enter.
To create an empty group
- Right-click an empty portion of the graph, choose Group, and then choose a group category. You can expand the group’s borders and add nodes to it.
To collapse a group
Do one of the following:
- Double-click the group.
- Right-click the group title bar and choose Collapse.
- In Node Inspector, toggle the Collapse Group setting on.
A collapsed group has a border with a dashed line.
To expand a collapsed group
- Do one of the following:
- Double-click the group.
- Right-click the group, and choose Expand.
- In Node Inspector, toggle the Collapse Group setting off.

To edit the name of a group
- Do one of the following:
- Right-click the title bar of an expanded group, and choose Edit group title.
- Left-click a group’s title bar. In Node Inspector, change the name in the Group Name setting.
To change the color of a group
- Do one of the following:
- Right-click the title bar of an expanded group, and choose a new color from the Apply Preset submenu.
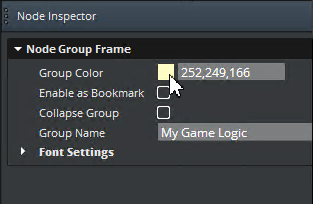
- Left-click a group’s title bar. In Node Inspector, change the RGB value in the Group Color setting, or use the setting’s Color Picker to pick a custom color, and choose OK.
To resize a group’s borders to fit the contents of the group
To reduce empty horizontal space within the group, double-click the group’s left or right border.
To reduce empty vertical space within the group, double-click the group’s top or bottom border.
To ungroup a group
- Right-click the group’s title bar, and choose Ungroup.
To delete a group and all of its nodes
- Do one of the following:
Right-click the group’s title bar, and choose Delete.
Left-click the group’s title bar, and press Delete.
Note:Deleting a group removes all of the nodes in the group and their connections to other nodes outside of the group. If you want to remove the group container but keep its nodes and connections, choose Ungroup.
Enabling groups as bookmarks
To quickly navigate through the groups in your graphs, you can enable groups as bookmarks.
To bookmark a group
Select the group.
In Node Inspector, select Enable as Bookmark.
For more information about working with bookmarks, refer to Adding Bookmarks.
Customizing groups
You can use the Node Inspector to customize the color of a group and to change the font settings of the group title.
To change the color of a node group
Select the node group.
In Node Inspector, do one of the following:
If you know the RGB values that you want to use, enter them in the Group Color text box.
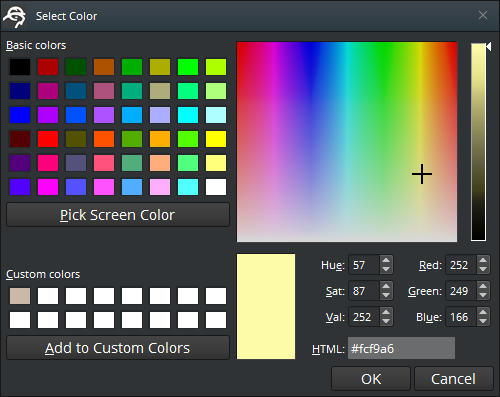
Click the Group Color icon to use the Select Color dialog box.

In the Select Color dialog box, specify the color that you want to use. You can choose from basic colors, create a custom color, or click Pick Screen Color to choose a color on your screen with your pointer.

Click OK.
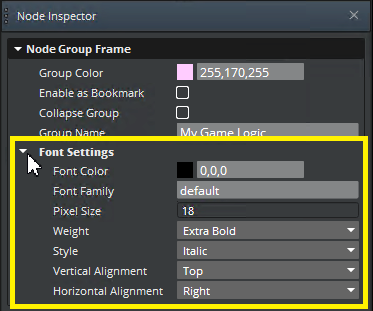
To change the font settings for the node group title
In Node Inspector, expand Font Settings.
Enter or choose the values that you want to use for the group title font. The changes that you make are immediately visible.

