IN THIS ARTICLE
Using Multiple Skin Attachments for an Actor
You can use multiple skin attachments on an actor or character to add interchangeable parts such as a hat or belt. TheA meshes for these additional attachments can be a part of a single FBX file or separated into multiple FBX files. When deciding whether to use a single FBX file or multiple FBX files, consider the following:
Single FBX file with all skinned attachments (meshes) embedded
- Works well for an actor with a limited set of added or active attachments.
- Causes initial performance slowdown with Asset Processor, especially with high fidelity meshes. The end result performance, however, is the same as with multiple FBX files.
- Reduces number of FBX files to manage, but limits flexibility in modifying assets.
Multiple FBX files, each embedded with a skin attachment (mesh) that can be applied to an actor.
- Multiple source files to manage within a project.
- Provides flexibility for multiple content creators to manipulate meshes as needed.
- Asset Processor generates an
.mtl(material) file for each FBX regardless of whether you intend to share materials.
Whether you use a single FBX file or multiple FBX files, you create an actor for each skinned mesh attachment. The single FBX file method requires some additional configuration in the FBX Settings tool.
For more information, see Customize FBX asset export with FBX Settings.
Using a Single FBX File
When you use a single FBX file embedded with multiple meshes, you must create an actor for each attachment. For example, a cowboy character would be an actor, while his interchangeable hat and belt must each be added as additional actors.
To add multiple actors from a single FBX file in the FBX Settings tool
In O3DE Editor’s Asset Browser, right-click the
.fbxfile that contains your meshes and choose Edit Settings.On the Actors tab, click Add another actor.
You should already have one actor for your character. The additional actors that you add are the attachments, such as articles of clothing.
For the Actor group, enter the actor name such as cowboy_hat and then click the mesh icon to select the mesh that you want as an attachment.

In the Select nodes dialog box, select the mesh, and then click Select.
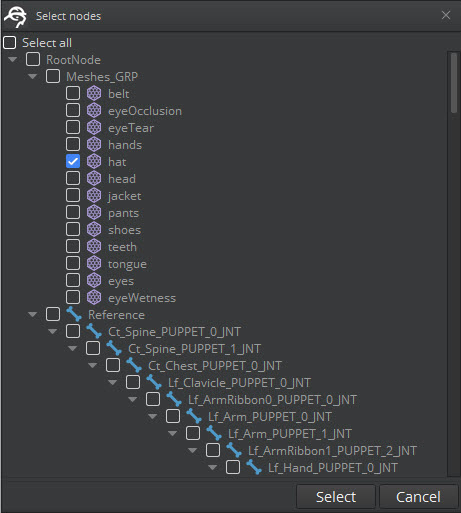
Your Actor groups should look like the following. Example
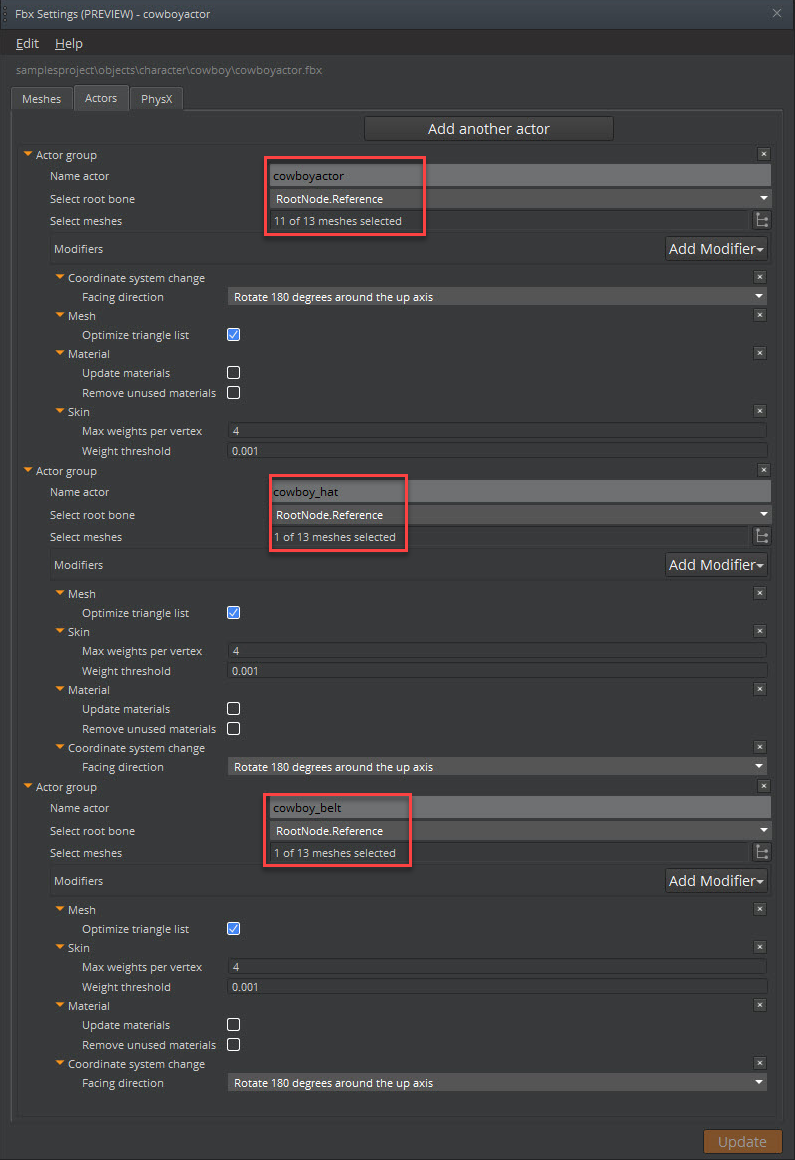
Click Update to save your settings and close the FBX Settings tool.
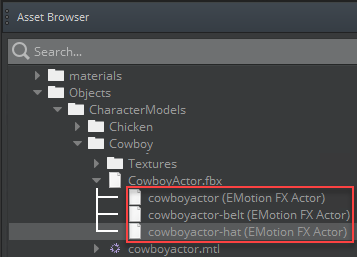
In the Asset Browser, navigate to the directory that contains your FBX file to view your actor files. You can see the primary actor and each attachment that you added. Example
In the Asset Browser, a single FBX file contains the primary actor and the attachments.
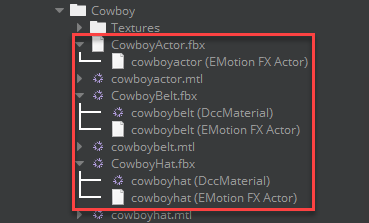
Using Multiple FBX Files
When you use an FBX file for each skin attachment, Asset Processor automatically generates an Actor file for each FBX file. Modify the FBX Settings tool only if you want to change the default Asset Processor behavior.
Example In the Asset Browser, multiple FBX files each contain a separate actor file.