IN THIS ARTICLE
Blend Two Node
With the Blend Two node, you can blend between two input poses based on a weight value. For example, the Blend Two node can blend smoothly between a walk and a run based on the character’s speed.
The Blend Two is similar to the Blend Two Additive node, except that it doesn’t support Additive Blend mode.
To use the Blend Two node
In O3DE Editor, choose Tools, Animation Editor.
Create a blend tree.
Double-click the blend tree node that you created.
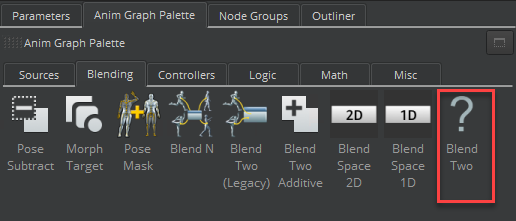
Select the Anim Graph Palette tab and then select the Blending tab.
Drag the Blend Two node into the animation graph.


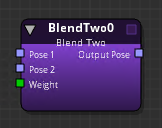
Connect nodes to the following inputs and output:
Pose 1 - The first pose.
Pose 2 - The second pose.
Weight - Blend weight.
You can use a Float Constant node, for example, to specify a float value between
0.0and1.0. A value of0.0means 100% of Pose 1 and 0% of Pose 2. A value of0.6weights 40% of Pose 1 and 60% of Pose 2. Other nodes that can specify Weight include the Parameter node, the Smoothing node, and so on.Output Pose - The result of the pose blending.
Blend Two Node Attributes
For attribute settings that are shared among the blend node types, see Blend Node Attributes.
The Extraction Mode for the Blend Two node is calculated as follows.
S= Source transform deltaT= Target transform delta
Root included in mask (or no mask provided):
- Blend =
S+ \(`T` - `S`\) * weight - Source =
S - Target =
T
Additive, root excluded from mask:
- Blend =
S - Source =
S - Target =
Zero
