IN THIS ARTICLE
Using Morph Targets to Deform Characters
A morph target is a deformed mesh that is stored as a series of vertex positions. Morph targets are also called blend shapes or vertex-level deformations. You can use morph targets to deform a character’s face to animate facial expressions or a character’s body part to correct undesired deformation of skinning. You can also simulate deformation of clothing on a character.
In the Animation Editor, you can use morph targets with one of the following nodes:
- Motion node - Plays morph target animations similarly as skeletal animations.
- Morph Target node - Animates morph targets by changing the weight at runtime.
Prerequisites
To use morph targets in the Animation Editor, you must do the following:
- Prepare your asset for
.fbxexport. For more information, see Customize FBX asset export with FBX Settings. - Create and animate morph targets on your character in your DCC tool (for example, Maya).
- Export the character as an
.fbxfile.
Topics
- Prerequisites
- Importing Morph Targets
- Opening Actor Files
- Previewing Morph Targets on Actors
- Creating Motion Nodes with Morph Targets
- Creating Morph Target Nodes
Importing Morph Targets
When you import an .fbx file into O3DE, all morph targets and morph target motions in that file are imported as part of the actor. This allows you to open your actor file in the Animation Editor without additional steps.
You can also change how morph targets are imported.
To change how morph targets are imported
- In the Asset Browser, right-click your
.fbxfile and choose Edit Settings.
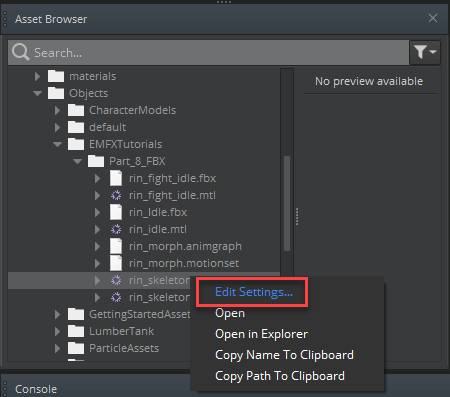
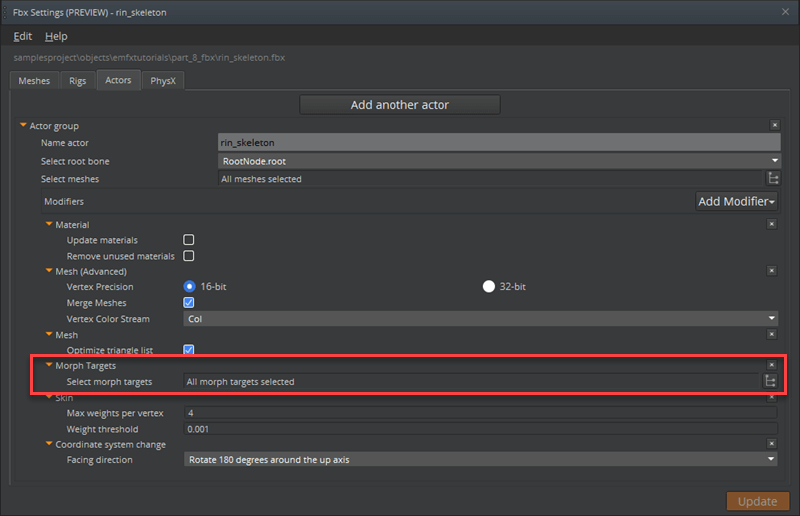
In the FBX Settings window, click the Actors tab.
A modifier appears to indicate that morph targets will be imported.
Click the button next to the Select morph targets field.
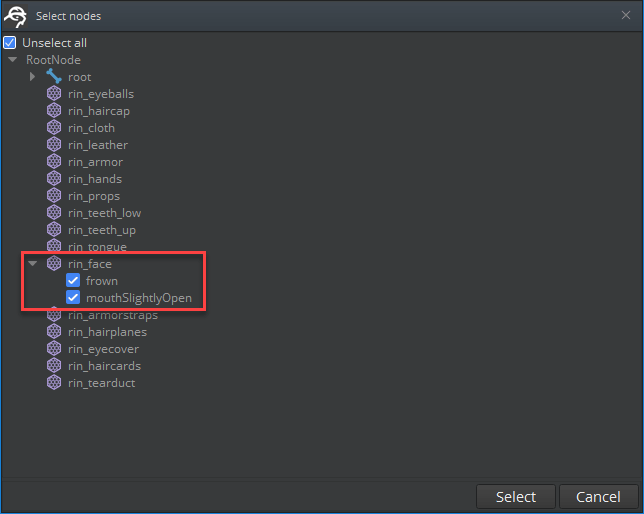
- In the Select nodes window, select the morph targets that you want to import, and then click Select.
- In the FBX Settings window, click Update to save your changes.
To change how morph target motions are imported
In the Asset Browser, right-click your
.fbxfile and choose Edit Settings.In the FBX Settings window, click the Motions tab.
Note:If you have morph target animations in your.fbxfile, a modifier appears to indicate that morph target motions will be imported. You can remove the modifier if you do not want the morph target motions in your.motionfile.
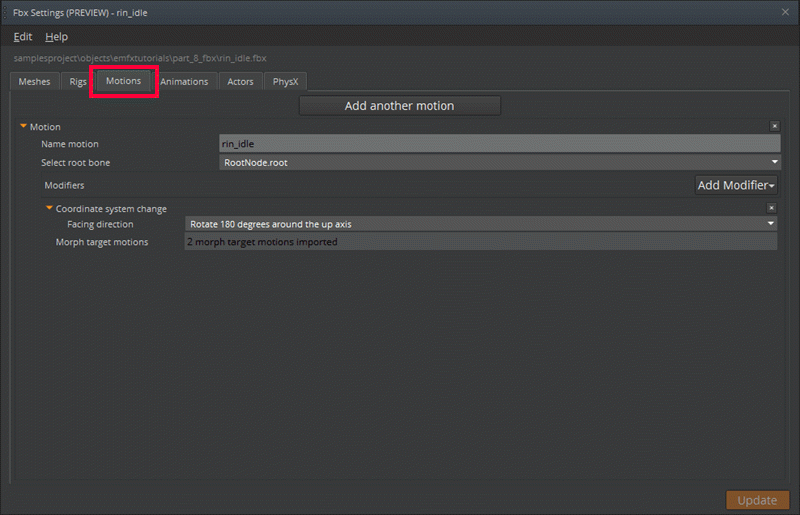
- Click Update to save your changes.
Opening Actor Files
When you open your actor file in the Animation Editor, all morph targets and morph target motions are imported by default. To change how morph targets are imported, see Importing Morph Targets.
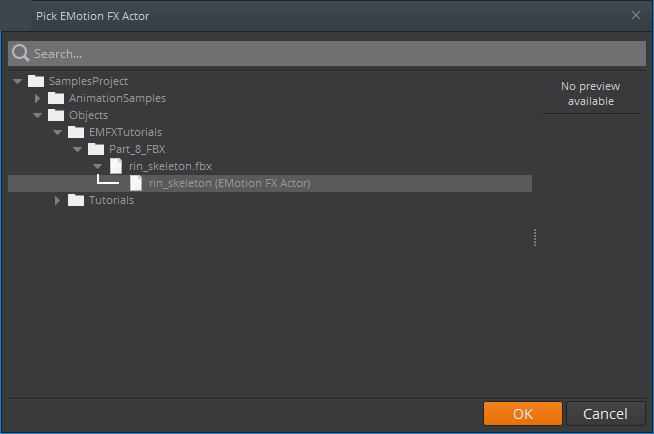
To open an actor file
In O3DE Editor, choose Tools, Animation Editor.
In the Animation Editor, choose File, Open Actor.
In the Pick EMotion FX Actor window, select an actor to import and then click OK.
Previewing Morph Targets on Actors
You can preview the morph targets on an actor.
To preview morph targets
In O3DE Editor, choose Tools, Animation Editor.
In the Animation Editor, choose View, Morph Targets.
In the Morph Targets window, preview morph target shapes on your actor by doing the following:
Select the Select All check box.
If enabled, the morph target sliders will override the morph target motions on your actor.
Move the sliders next to the morph target name to see the actor’s mesh deform.
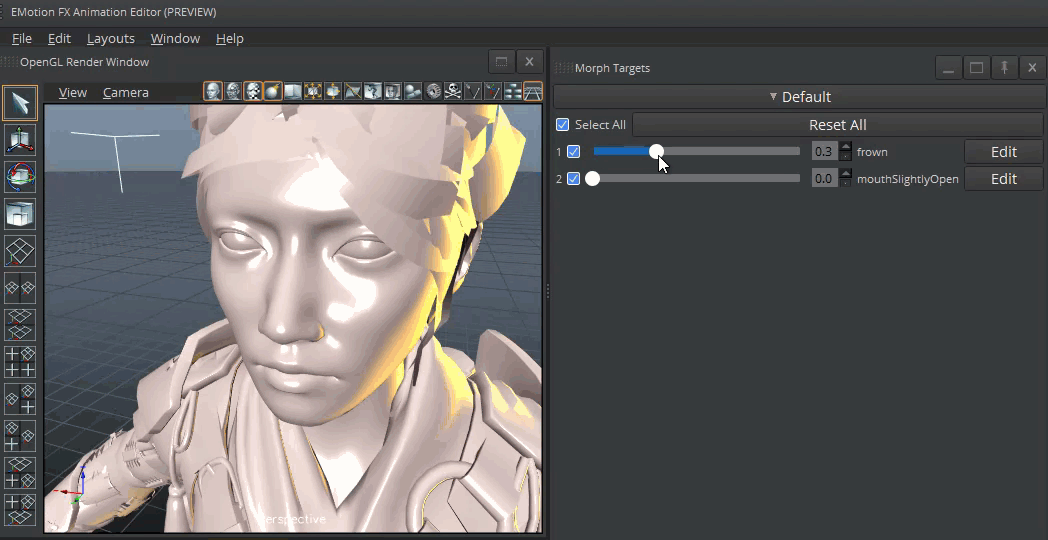
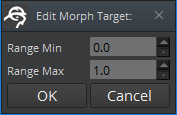
- Click Edit next to the morph target to adjust the range of the slider as needed. The default range is
0to1.
When you’re done previewing the morph targets, clear the Select All check box and close the Morph Targets window.
Creating Motion Nodes with Morph Targets
Creating a motion node with morph targets is similar to other methods of motion node generation.
To create a motion node with morph targets
In the Animation Editor, on the Motion Sets tab, under Motion Set Management, do one of the following:
- Click the + icon to create a motion set.
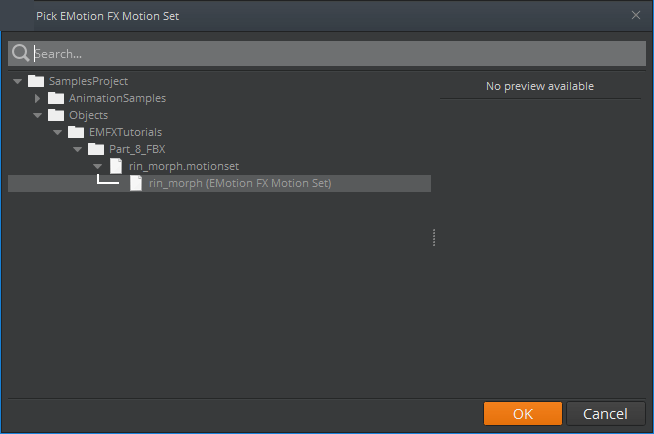
- Click the folder icon to open the Pick EMotion FX Motion Set window and select a motion set to import. Click OK.
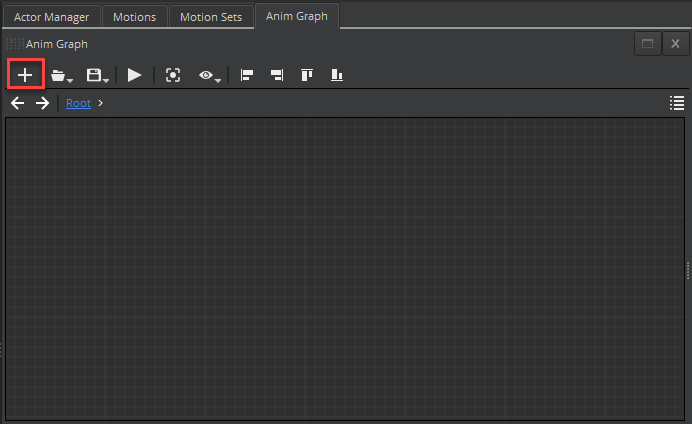
In the Anim Graphs pane, click the + icon to create an animation graph.
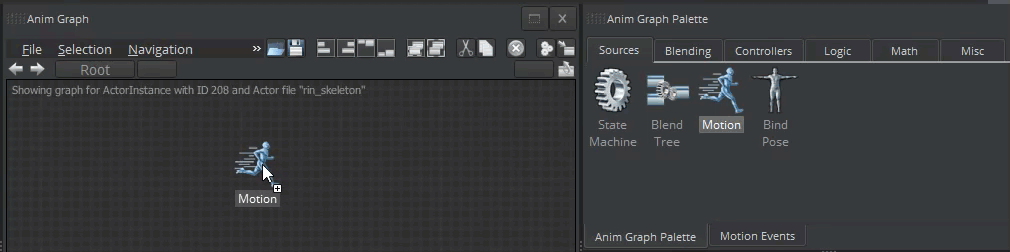
- Drag the Motion node from the Sources tab in the Anim Graph Palette to the animation graph.
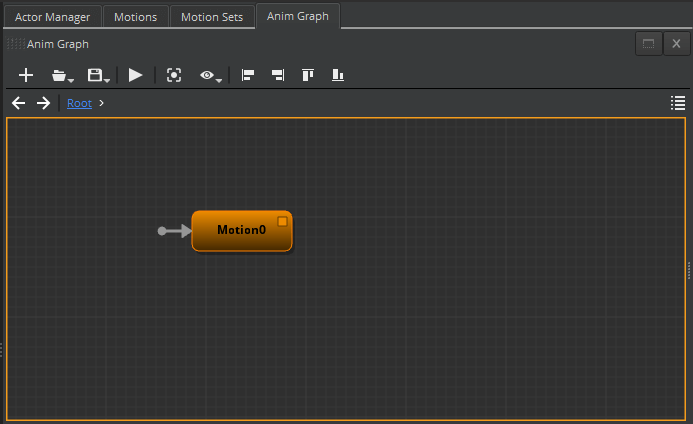
- In the animation graph, select the Motion node that you added.
- In the Attributes pane, click Select motions.
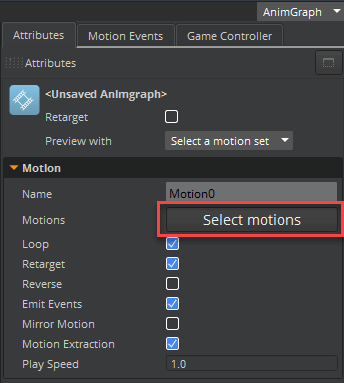
- In the Motion Selection window, select the motion with the morph targets that you want to import and then click OK.
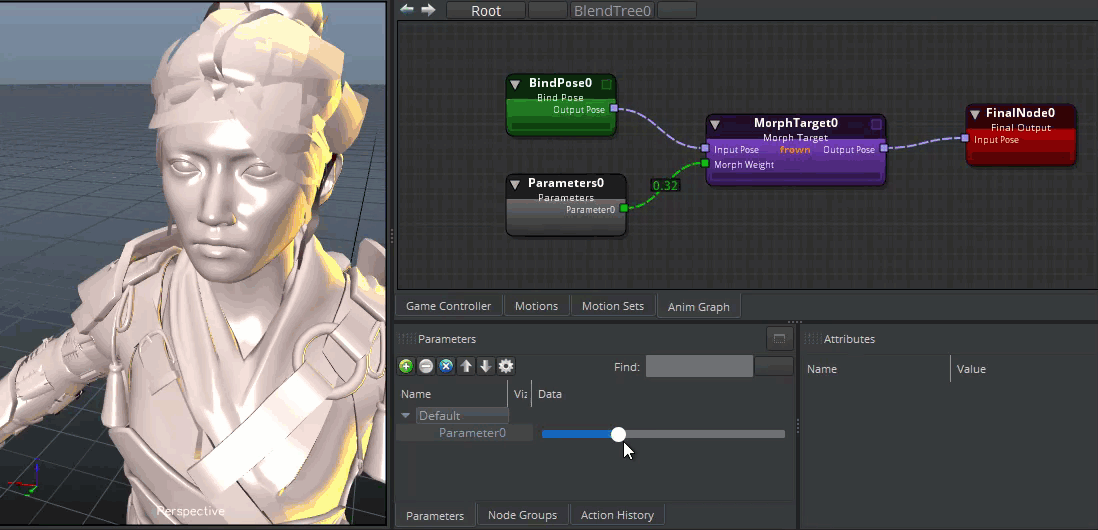
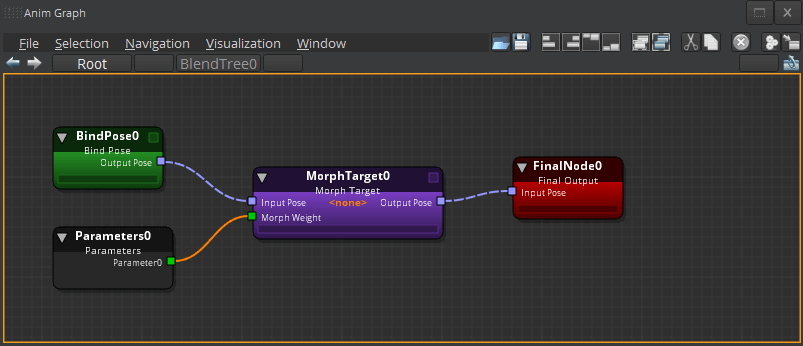
Creating Morph Target Nodes
As an alternative to creating a motion node with morph targets, you can use a Morph Target node to directly animate morph targets in the animation graph.
To create a morph target node
In the Animation Editor, drag the Blend Tree node from the Sources tab in the Anim Graph Palette to the animation graph.
In the animation graph, double-click the Blend Tree node. You should see a Final Node node and additional nodes in the Anim Graph Palette.
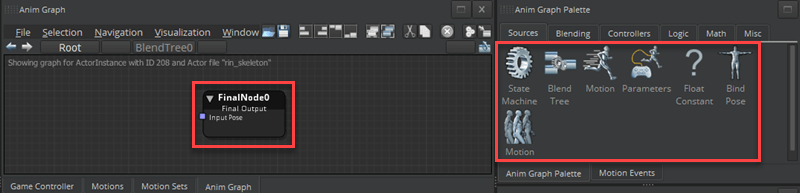
Drag the Morph Target node from the Blending tab in the Anim Graph Palette to the animation graph.
Do the following to add a bind pose to use as an input pose:
Drag the Bind Pose node from the Sources tab in the Anim Graph Palette to the animation graph.
Connect the Output Pose for the Bind Pose node to the Input Pose for the Morph Target node.
Do the following to add a parameter to control the weight of the morph target:
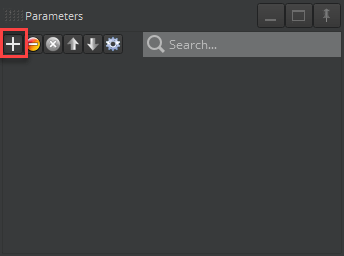
Drag the Parameters node from the Sources tab in the Anim Graph Palette to the animation graph.
In the Parameters pane, click the + icon to create a parameter.
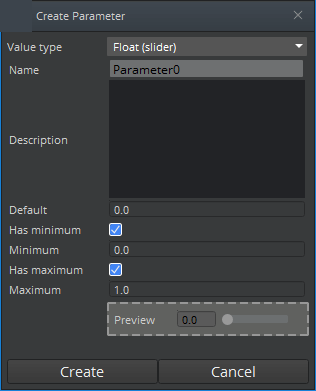
In the Create Parameter window, do the following:
For Value Type, select FloatSlider.
For Minimum and Maximum, use the default values.
Click Create.
In the animation graph, do the following:
Connect the Parameter for the Parameter node to the Morph Weight for the Morph Target node.
Connect the Output Pose for the Morph Target node to the Input Pose for the Final Node node.
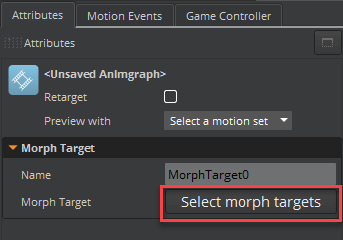
In the animation graph, select the Morph Target node if it’s not already selected.
In the Attributes pane, click select morph targets.
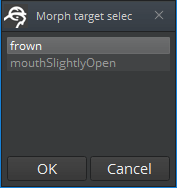
- In the Morph target selection window, select the morph target that you want to import and then click OK.
The morph target is updated in the Morph Target node in the animation graph and in the Attributes pane.
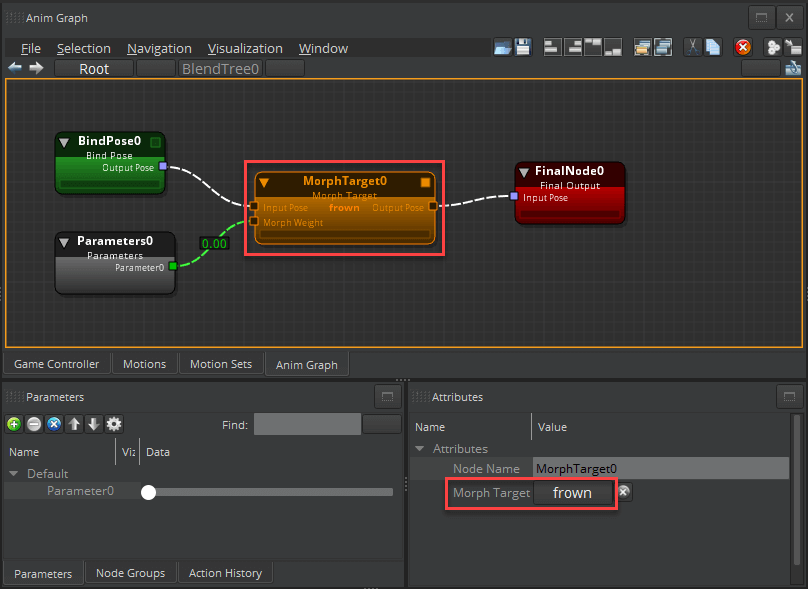
In the Anim Graphs pane, activate the animation graph by double-clicking the name.
In the Parameters pane, move the slider to play the animation.