Setting Up Simulated Object Colliders
In the following procedure, add a collider to the spine and left arm to reduce the tassel’s movement. This ensures that the tassel has something to collide with, which prevents it from moving through the actor’s body.
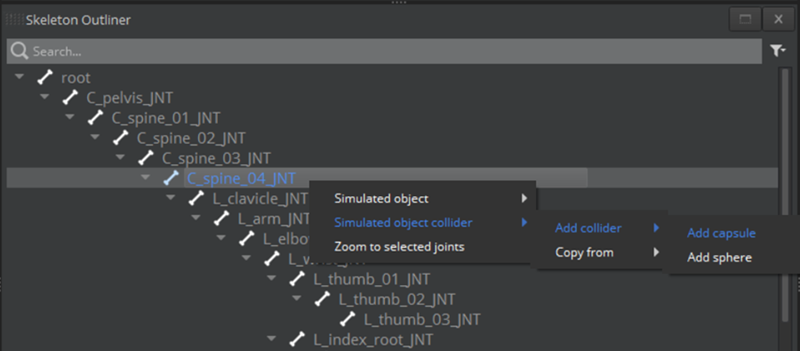
To set up simulated object colliders
In the Skeleton Outliner, select the joint or joints to add a simulated object collider to. In this example, use the
C_spine_04_JNTjoint.Right-click your selection and choose Simulated object collider, Add collider, Add capsule. This creates a shape that defines the collider area for the joint.
You can also add a sphere if that shape fits your actor better.
In the Skeleton Outliner, a simulated object collider
 icon appears next to the joint.
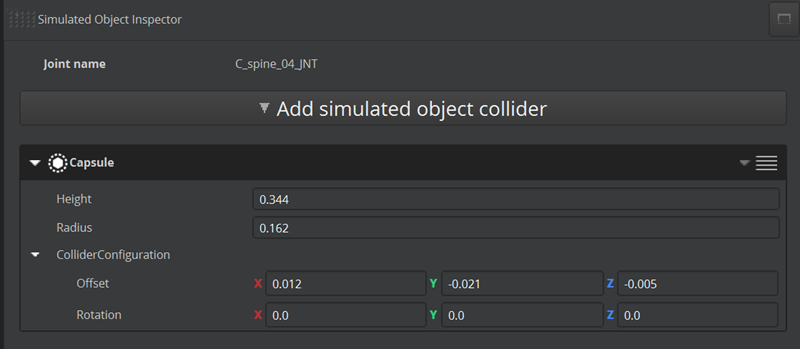
In the Simulated Object Inspector, adjust the capsule so that it’s larger than the actor’s geometry.
In this example, change the Height to
0.344and the Radius to0.162.By default, the name of the joint \(`C_spine_04_JNT`\) is also the name of the collider.
Repeat Step 1 to add the
L_arm_JNTjoint. This creates another simulated object collider to the upper-left arm.Repeat Step 2 and 3 to set up a collider for the arm.
Adjust the capsule so that it fits the arm. In this example, enter the following values:
- Height to
0.322 - Radius to
0.081 - Rotation: X to
180 - Radius: Y to
89.99 - Radius: Z to
180
By default, the name of the joint \(`L_arm_JNT`\) is also the name of the collider.
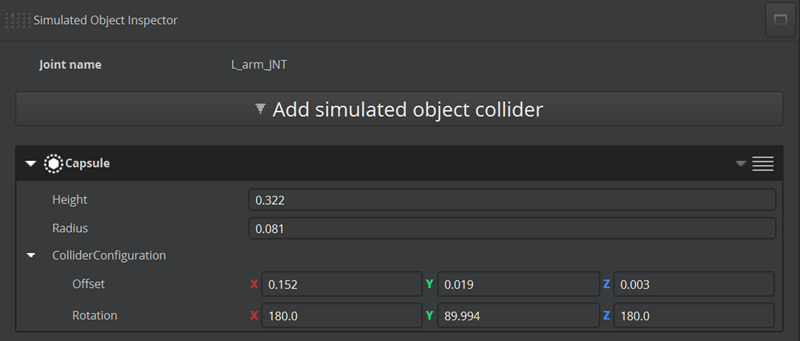
- Height to
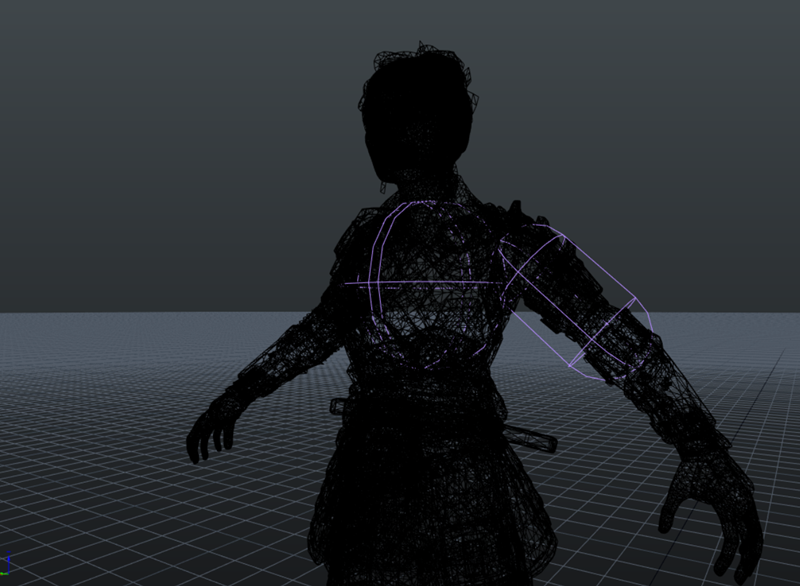
In the Skeleton Outliner, select the joints where the simulated object colliders are attached.
Tip:In the render window, deselect the first icon (Solid) and select the second (Wireframe) to view the capsule colliders.In the render window, the colliders appear purple. If you deselect the joint, the collider appears gray.
Now that you added the simulated objects to the spine and arm, add these colliders to the simulated object.
In the Simulated Objects panel, select the simulated object.
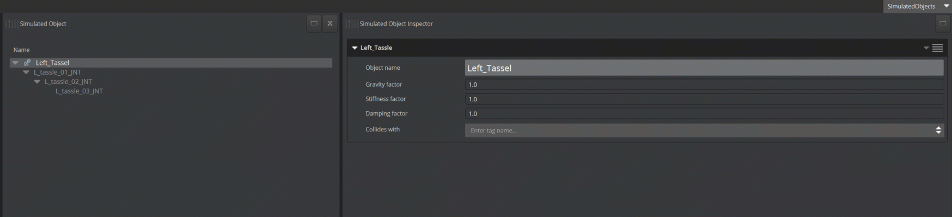
In the Simulated Object Inspector, for Collides with, select the available colliders. This enables the simulated object joints (the tassel) to collide with the actor’s body (the spine and left arm).
In the Actor Manager, save the actor. You might have to wait for Asset Processor to finish processing your changes.