Using Animation Curves
The Curve Editor displays animations as function curves. Each track’s curves represent an animation of a property value, such as anchor, offset, color, or any property of a UI element.
To open the Curve Editor
Do one of the following:
- In the Track View, choose View, Curve Editor.
- In the View toolbar, choose the Curve Editor icon
 .
.
Select a keyframe in the timeline to view it in the Curve Editor.
Note:You can have the Track View and Curve Editor open simultaneously if you prefer to access both tools.
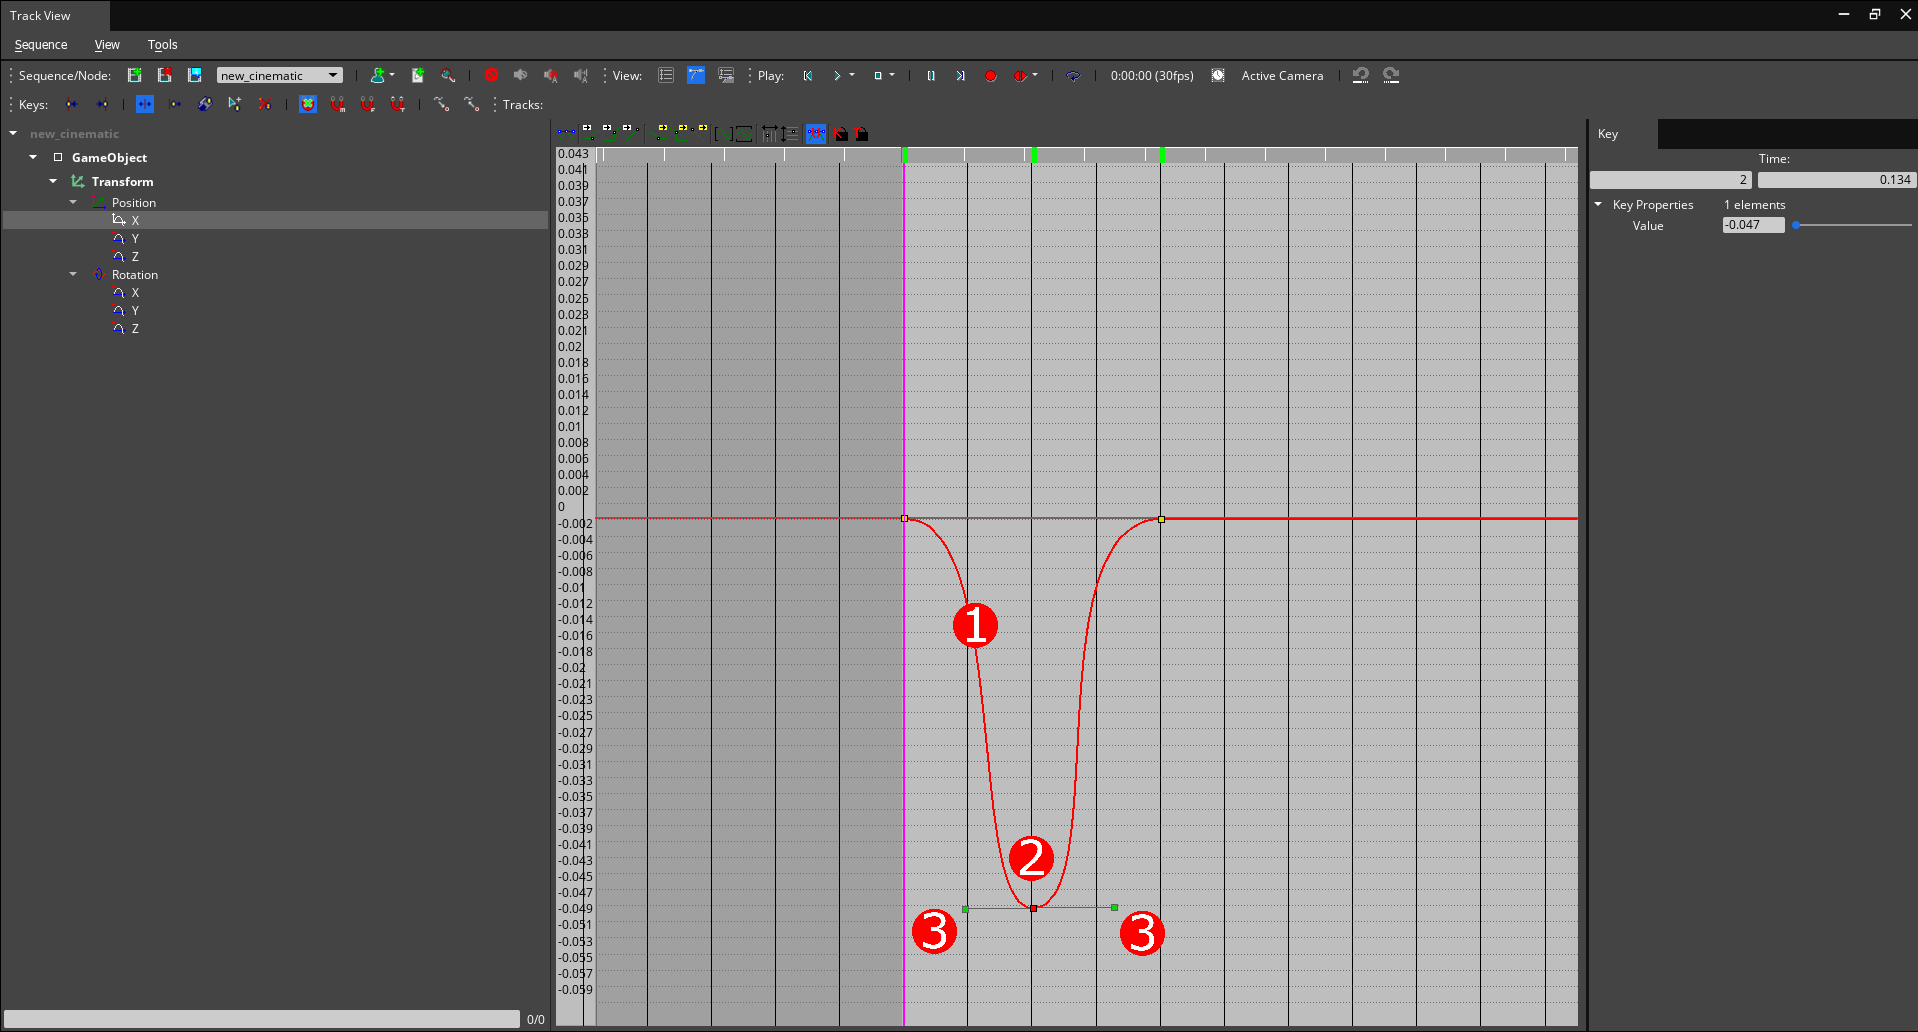
A curve has the following three parts:
Curve or spline.
Keys on the curve/spline.
Tangent handles for the keys.

To edit elements in a curve
Select a key to see the associated tangent handles and then drag the boxes on the keys or the ends of the tangent handles (including unify tangents and automatic tangents) to manipulate them.
When moving keyframes, press and hold Shift to constrain the movement to time only.
Press and hold Alt to scale the selected keyframes around the playhead location.
The path of the curve represents the transition of the value between the keyframes. If the value changes in a straight line between each keyframe (linear), transitions between keyframes aren’t smooth. The default curve causes the value to smoothly ease in and ease out. Each key has an in tangent and an out tangent. Depending on the preferred effect, you can use the toolbar icons to switch the tangents to auto, zero, step, or linear. You can also manually drag the tangent handles.
By default, animation tracks are recorded with a smooth transition. You can use the buttons in the toolbar at the top of the Curve Editor to change how the curves behave on either side of the selected key. You can also drag spline keys to a different point in the timeline.
See the following tips for working in the Curve Editor:
- To zoom in or out, scroll the mouse wheel
- To pan the view, click and drag the middle mouse wheel
- To select multiple spline keys, click and drag to select the keys
To adjust a spline key
In the Node Pane, select a track. The curves for that track appear in the Curve Editor.
In the Curve Editor, select a spline key.
Do one of the following:
- Drag the spline key to a different point on the timeline.
- Use the toolbar buttons to select a preset: auto, zero, step, or linear.
To edit multiple elements at once
In the Node browser, select the parent track or sub-track.
Drag the spline key to a different point on the timeline.
Use the toolbar buttons to select a preset: auto, zero, step, or linear.
