IN THIS ARTICLE
Creating Projects Using O3DE Project Manager
This tutorial provides an introduction to project configuration and building in Open 3D Engine (O3DE). The instructions here and in the video will guide you through the following steps:
- Configure the Project Manager engine settings.
- Create a new O3DE project.
- Build the O3DE project.
At the end of the tutorial, you’ll have a new O3DE project based on the default project template, ready to open in O3DE Editor.
Prerequisites
The following instructions assume that you have:
- O3DE installed or built as an SDK engine on your computer. For help, refer to Set up Open 3D Engine.
- Met all hardware and software requirements listed in O3DE System Requirements.
Note:If you set up O3DE from GitHub and chose the source engine build type, you need to create a project from the command line and build it before you’ll have a version of Project Manager that will work with your new project. Follow the instructions in Creating Projects Using the CLI to create a project for your source engine.
Launch Project Manager
Either launch Project Manager from an icon on your desktop, or open a file browser or command line window on your computer and navigate to your O3DE engine directory. Locate and launch the O3DE Project Manager application,
o3de.exe, from<install-directory>/bin/<platform>/profile/Default.Important:If you built an SDK engine from source using theINSTALLtarget, make sure you launch the Project Manager and other tools from the install directory, not the build directory in the engine root. For example, the Windows install directory will typically end in/bin/Windows/profile/Default.
Configure the engine settings
If this is the first time you’ve used Project Manager to create a project, then check and configure the O3DE engine settings before you create and build the project.
Choose the Engine tab near the top of Project Manager.
Review the default locations and update as desired, taking into consideration that the 3rd Party Software Folder and a typical project located in the Default Projects Folder each require 10 - 20 GB of free space on a computer. O3DE uses your user directory in all the locations by default.
If you set up and built O3DE from GitHub, you can set the 3rd Party Software Folder to the same packages directory you created when you built the engine (for example,
C:\o3de-packages), to avoid downloading the same packages again when the project builds.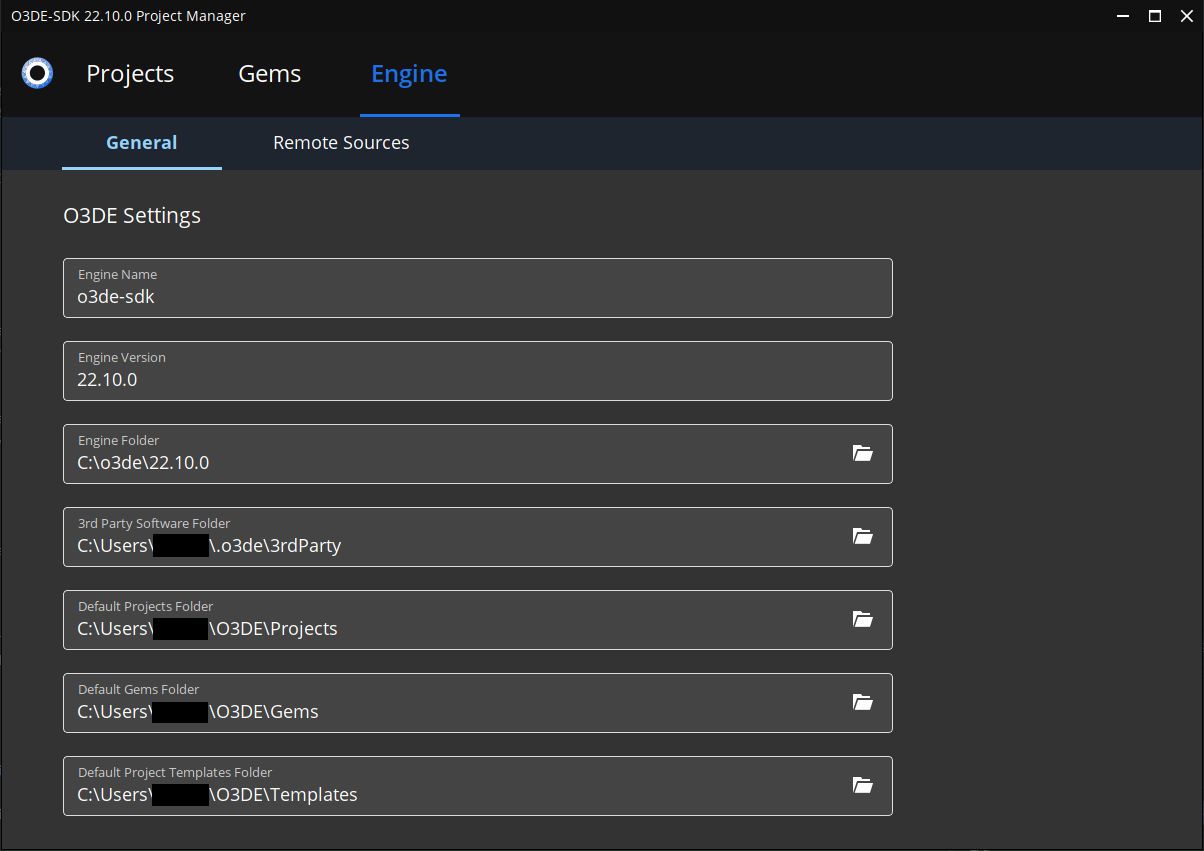
Go back to the Projects tab when you have finished updating the engine settings.
Create a new O3DE project
In Project Manager, choose Create a Project. This will guide you through creating a new project, starting from the default project template. It will also register the O3DE engine, if you haven’t already registered it.
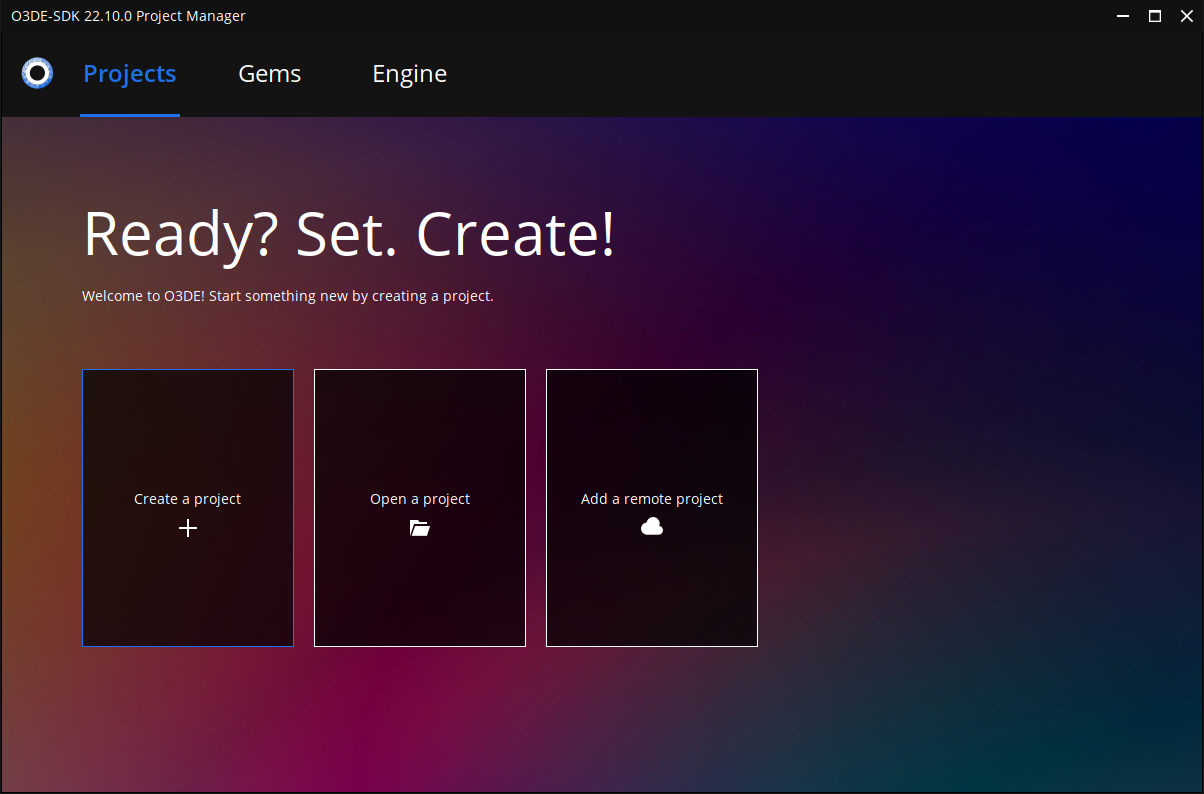
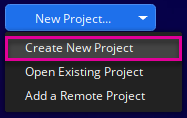
If you have already registered one or more projects, open the New Project dropdown menu instead and choose Create New Project.
Under Project name, give your project a name. You can use up to 64 letters, numbers, underscores (’_’), or hyphens (’-’). Spaces are not allowed.
If you want to change the project location, under Project Location, choose the folder icon, and then use the Browse dialog box to choose a new location. If needed, you can create a new project folder. The folder that you choose becomes the project root directory.
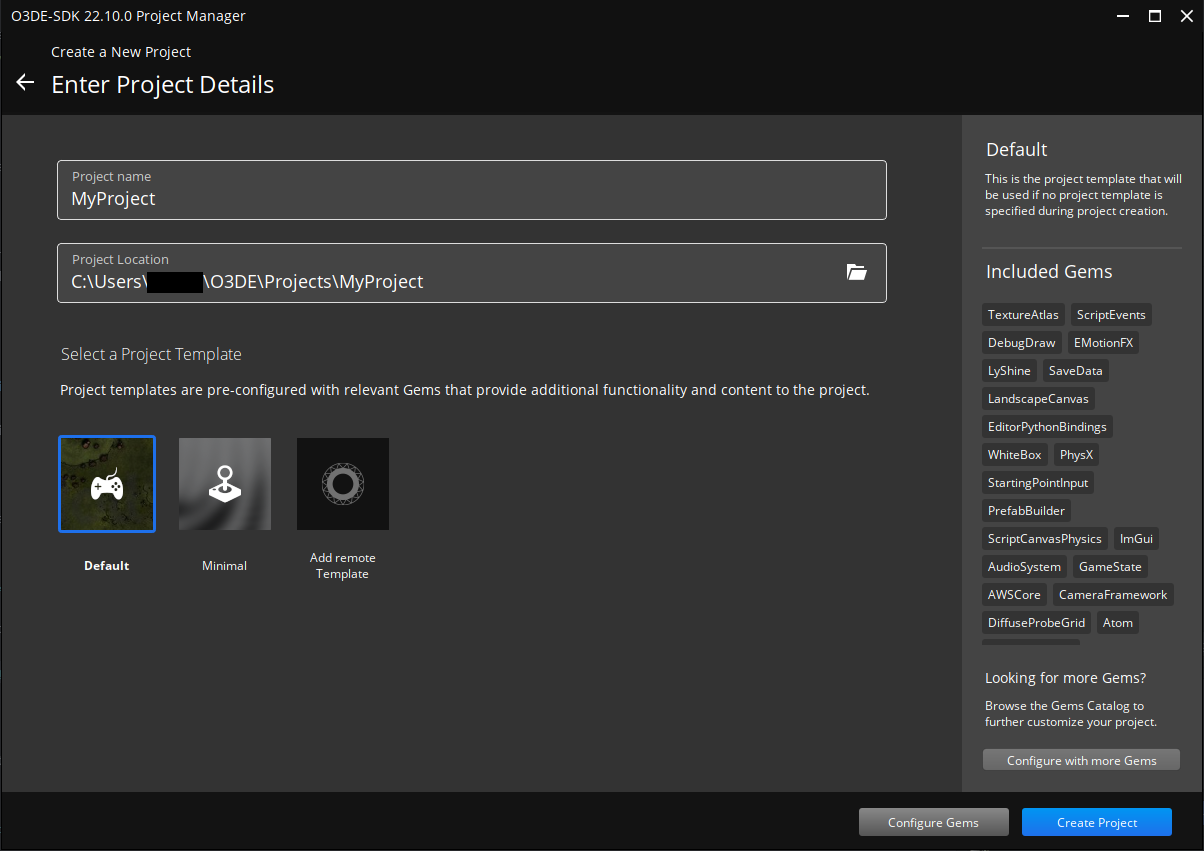
Under Select a Project Template, you can choose a project template with a pre-configured selection of Gems. You can modify the list of Gems enabled for your project by choosing the Configure Gems button. This tutorial uses the default template and its pre-configured selection of common Gems. Other templates are available. For more information about templates, and which templates are available, refer to the documentation on Templates in the User Guide.
Choose Create Project to create the project files in the project location you selected. This also registers your project in the O3DE manifest, located at
<user-folder>/.o3de/o3de_manifest.json.
Build the O3DE project
You are now ready to build the project from Project Manager.
Inside your project’s icon box, open the Build Project dropdown menu and choose Build Now.
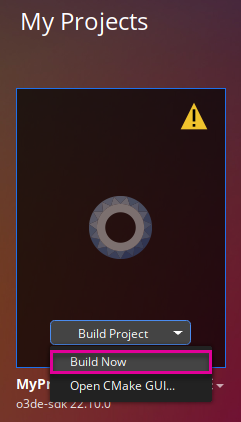
After choosing Yes in the next dialog box to confirm that you are ready to build your project, the build will begin.
Note:The first build may take some time to complete if the required third-party packages need to be downloaded.When the build completes, you can find the project binaries in your project directory under
build/<platform>/bin/profile.Note:On Windows, if you have multiple versions of Visual Studio installed, Project Manager will build with the highest version detected. To specify the version of Visual Studio, use the CMake environment variableCMAKE_GENERATOR_PLATFORMwith a value from the CMake generator list .Note:On Windows, if you have multiple versions of Visual Studio installed, Project Manager will build with the highest version detected. To specify the version of Visual Studio, use the CMake environment variableCMAKE_GENERATOR_PLATFORMwith a value from the CMake generator list .To open your built project in the Editor, move your pointer inside your project’s icon box and choose Open Editor.
For more information about project configuration and building, refer to the Project Configuration and Build sections of the User Guide.
