IN THIS ARTICLE
Key Concepts: How Open 3D Engine Works
Open 3D Engine (O3DE) provides a complete, end-to-end environment for developing and packaging graphically intensive games, simulations, and applications on a wide variety of platforms. Because it’s a large development environment with so many different features and tools, O3DE can be intimidating at first. This topic covers the various parts of O3DE at a high level, and the common ways you can work with it depending on your role as a developer, designer, or artist.
O3DE consists of tools, editors, and systems that help you build your project. At its core, it provides the following:
- Core modules that provide math, memory management, serialization, event messaging, and more.
- Authoring tools such as the Editor and related applications for placing objects in a level, adding components, and scripting logic.
- A plugin and extension system for adding more features.
- Asset pipeline tools for converting, optimizing, and bundling assets.
- A build system to build and package a shippable launcher.
O3DE is comprised of sub-modules, called Gems. As you develop a project, you can add features and functionality by including Gems that supply those features and functions. Gems might include anything from assets such as materials, textures, and models, to development tools such as Script Canvas (a visual script editor), to entire runtime systems such as the Atom renderer, AI, and Physics.
Think of O3DE as a collection of discrete elements: code, scripts, various GUI-based editors, and command-line tools. When you compile a project, O3DE’s build scripts pull in all the pieces that are specified in your project’s configuration. When built, your project will only use the parts of the O3DE SDK that you included in your configuration. Likewise, the asset bundling and management tools ensure you only ship the assets that your project requires.
The following image shows the structure of project runtimes built with O3DE:
Overview of the O3DE SDK
O3DE is modular—it’s constructed of a common core that all modules depend on, with plugins and extension systems that add more features. These core modules are provided by the O3DE software development kit (SDK) and are the essential frameworks to extend the engine with new features.
The following image illustrates the dependency graph for O3DE’s core modules: AzCore, AzFramework, AzGameFramework, AzToolsFramework, and AZQtComponents. High-level products, such as project runtimes, command line interface (CLI) tools, and graphical user interface (GUI) tools, all depend on the core modules.
For more information on O3DE’s engine core, refer to the Programming Guide.
High-level O3DE directories
There are three primary directories to be aware of with O3DE: The O3DE engine directory, and the O3DE and .o3de directories in the user’s home directory.
O3DE engine

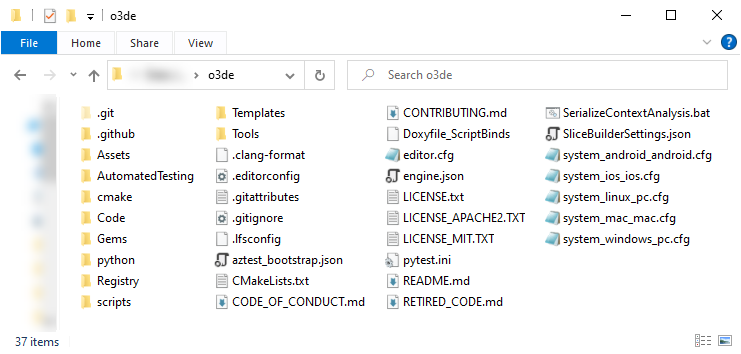
The O3DE engine directory contains O3DE’s core engine, various tools including O3DE Editor, and the Gems and templates that are included with the engine. The directory name depends on how you install O3DE, but here are some common variations:
o3de– if you cloned it from theo3derepository in GitHub.o3de-development– if you downloaded thedevelopmentbranch as a ZIP folder from theo3derepository in GitHub.o3de/<version>– if you installed the O3DE binary by running the installer.
A source code directory, such as o3de or o3de-development in the preceding example, contains all of the source code that makes up O3DE’s core, whereas an install directory, such as o3de/<version>, contains pre-built binaries to run O3DE and its tools.
When you begin to work in O3DE, you’ll learn more about O3DE subdirectories in the Programming section.
O3DE

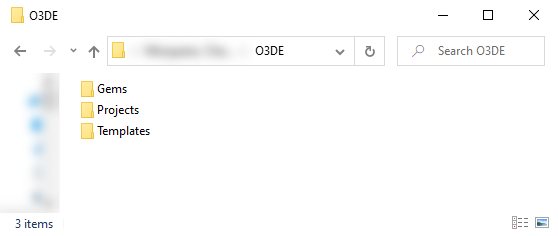
The O3DE directory is located in the user’s home directory. It contains the default locations for user-created Gems, projects, and templates.
.o3de

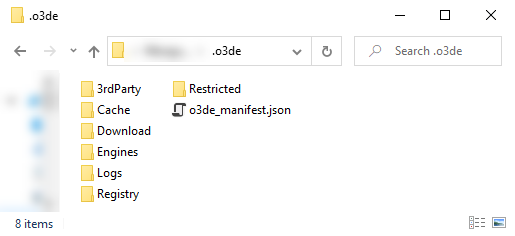
The .o3de directory is located in the user’s home directory. It contains O3DE configuration settings and Project Manager logs, the default location for third-party downloadable packages, and other user-specific directories:
/o3de_manifest.json: The O3DE manifest informs O3DE of the registered engines, projects, and other external O3DE objects./3rdParty/: The default directory for packages from third-party libraries that are required to build some O3DE features./Logs/O3DE.log: A log file for theo3de.exe(Project Manager) application./Registry/ProjectManager.setreg: Project Manager registry settings.
Working with Gems
O3DE is a sandbox of development tools and assets, provided by Gems, that you can combine and use within your project. You only need to include the Gems that provide the features and functionality that your project requires. This modular approach allows the community to provide packaged features and assets to extend O3DE, and even provide alternate solutions for entire systems. Suppose you’d like to use an unsupported file format, an alternate scripting language, or a version of a system that has some cutting-edge experimental features. You can use solutions that your team or other O3DE contributors have provided in their own Gems, or you can create a Gem yourself that provides that support and share it with other O3DE users. By focusing on modularity, you can safely experiment with different features without risking progress and unintended regression on your project. Asset collections, code samples, components, libraries, tools, and even entire game projects can be distributed as Gems.
You enable Gems when you create and configure your project. You can enable additional Gems and disable unused Gems at any time by updating your project configuration. Some Gems are core systems and are required for all O3DE projects. Other Gems are extensions for existing Gems and require their dependencies to be enabled for your project. Enabled Gems are detected and built automatically when you build your project. Refer to the Gems Reference for a complete list of Gems available in O3DE. To use them in your project, follow Adding and Removing Gems in a Project.
You can create your own Gems and easily reuse and distribute your own code and assets. To get a better idea of what goes into creating a Gem, have a look at the Gems directory in your O3DE engine installation and examine the Gems included with O3DE. The process for creating your own Gem is very similar to creating a project. Learn to develop Gems in the
Programmer’s Guide to Gem Development.
EBus messaging system
All of the Open 3D Engine Gems and systems, as well as the components in your projects, need a way to communicate with each other. O3DE uses a general-purpose communication system called Event Bus (EBus for short).
Gems and systems are typically implemented as DLLs. EBus provides one way to communicate between these DLLs and invoke functions in one Gem or system from another. EBus provides both request and publish/subscribe event interfaces that allow calls across those DLLs. For example, if you’ve created a Gem for custom animation behaviors and you’d like to provide methods or properties to the physics system, you’d do so by implementing an EBus interface in your Gem.
The two types of EBuses are:
- Request bus: This EBus type registers a handler for a method that can be called by other systems.
- Notification bus: This EBus type provides a messaging interface for notifications that systems can publish or subscribe to.
EBuses have many advantages over traditional polling methods:
- Abstraction - Minimize hard dependencies between systems.
- Event-driven - Eliminate polling patterns for more scalable and higher performance software.
- Cleaner application code - Safely dispatch messages without concern for what is handling them or whether they are being handled at all.
- Concurrency - Queue events from various threads for safe execution on another thread or for distributed system applications.
- Predictability - Provide support for ordering of handlers on a given bus.
- Debugging - Intercept messages for reporting, profiling, and introspection purposes.
With EBuses, you can:
- Make direct global function calls.
- Dispatch processing to multiple handlers.
- Queue all calls, acting like a command buffer.
- Use as an addressable mailbox.
- Perform either imperative or queued delivery.
- Automatically marshal results of a function call into a buffer.
Interfaces are provided for the Gems and systems DLLs included with O3DE. To use the functionality in these DLLs, you use the interfaces in the headers to register for a single cast (Event) or broadcast (Broadcast) event, or through supplying a data request functor to a request bus handler.
Likewise, to expose functionality from your own Gems and provide data to another system, you must inherit the virtual interface that’s declared in the corresponding header file and implement the handlers on that interface in your Gem’s classes. You then register the handlers with the EBus system. Specifically, you’ll register a handler that you create with EBus, which will pass a pointer to your class method to the targeted system or post a notification to the systems that are subscribed to it.
Inside of your Gem code, you also manage the connection and disconnection of your implemented handler for the EBus. EBus is just a list of handlers that calls all the functors (function pointers) registered with it.
For singleton handlers where you only need one interface to communicate across DLLs, consider using AZ::Interface and AZ:Event directly, without EBus.
For details on using EBus, see Working with the Event Bus (EBus) System
Component entity system
Understanding the component entity system is fundamental to using O3DE. It’s conceptually simple: Every in-game object you create for your project is an entity, with a unique ID and container. Each entity contains components that provide functionality. The functionality that components provide is broad and can include primitive shapes for collision and overlap detection, meshes and materials, audio, artificial intelligence behaviors, animation, physics, scripts, and so much more. There are even components that provide tool and debugging functionality.
As an example, suppose you want to create a door entity that can be opened and closed. You made a mesh and a couple audio files. Now, consider the functionality your door must have.
- Display the door model.
- Play back the audio files when the door opens and closes.
- Prevent passing through the door when it’s closed.
- Animate the door open and close.
- Trigger the door open and close by some mechanism.
Knowing the functionality that your door entity needs, you add components to the entity for each aspect of the door, including its presence in the game world and the ways a player can interact with it. A Mesh component visually represents the door in the game world. Audio Trigger components provide the audio when it opens or closes. A PhysX Collider component prevents a player from passing through the door when it’s closed. Script Canvas components define the behaviors, including animation and sound playback, when the door is opened or closed. Whatever behavior you need to model, each entity needs a collection of components to support it. The only component that’s common to all entities is the Transform component, which provides the position, orientation, and scale of your entity in the game world.
Spawnables and prefabs
Entities are easy to grasp and create, but can become complex. If the entity requires a lot of functionality, the list of components grows quickly. What if you want to add a latch with its own animation and audio to the door? What if you want to add a breakable glass pane to the door? Suddenly, the entity goes from having five components to dozens of components. This is where prefabs and spawnables come in.
A prefab, like an entity, is a container with a transform component. Instead of containing components, however, a prefab contains one or more configured entities and might contain other prefabs as well. To create a more complex door, you could have the initial door entity, a second entity for the latch and its components, and a third entity for the breakable glass pane and its components. These three small entities are collected into a prefab that provides a reusable, fully functional door asset.
A spawnable is simply a dynamic prefab. Where a prefab is best suited to environmental assets such as doors and static scenery such as rocks and foliage, a spawnable is used to represent any dynamic object. Non-player characters, projectiles, and dynamic scenery objects are all examples of spawnables.
Behaviors applied to a prefab or a spawnable can potentially cascade down to all of the entities that it contains, and then down to the components of that entity. However, the reverse is not true, as it would make no sense for a window shattering to apply to a door latch.
When you’ve internalized the spawnable > prefab > entity > component hierarchy, consider how you would use these concepts to develop the various elements potentially populating your project.
O3DE Asset Pipeline
Within the context of O3DE, an asset is a resource file, saved on disk, that’s consumed by your project in some way. An asset might be a font for your user interface, a bitmap file that contains a grassy terrain texture, a rock mesh you sculpted, animations for a character, and so on. Some assets might be created in O3DE. For example, you can use O3DE’s Asset Editor to create specialized files called inputbindings that map buttons from a game pad to input events for your project and physicsmaterials that describe the physical properties of surfaces.
Many assets must be processed, for performance or other reasons, before they can be consumed by O3DE. The process of converting source assets to runtime-optimized product assets is called the Asset Pipeline. The processing is performed automatically by Asset Processor.
Asset Processor is a background process (you’ll see its icon in the task tray when it’s running) that constantly scans directories in your project for new and updated files. Asset Processor uses configurable rules to determine how to handle new and updated asset files. The objective is to have game ready versions of all assets for each OS and each game directory in a location called the asset cache. The asset cache is kept separate from your asset directories and can be automatically rebuilt entirely from your source assets by the Asset Processor.
The asset cache contains a full image of all files (except executables and related files) that are needed to run your project. Asset Processor keeps the image up to date, ensuring that new files are ready to use in the project runtime and O3DE Editor as soon as possible. Your project runtime will only load assets from the asset cache and never directly from your asset source directories.
Projects can have thousands of assets that need to be monitored and processed for multiple target operating systems. To manage this complexity, the Asset Pipeline is completely configurable. Here are just some of the configuration options available:
- Specify what directories should be monitored for changes.
- Specify target operating systems and tailor the Asset Pipeline’s behavior per target operating system.
- Set the number of concurrent processing tasks.
- Use metadata information to associate file types and process side-by-side assets.
- Add your own asset types to the Asset Pipeline.
- Batch asset processing on a build server.
When you’re preparing to ship, you’ll need to package the assets that your project uses. Even small projects can have hundreds of assets, including multiple versions of assets, many of them not required in your final distributable. Manually tracking and determining which assets you need to ship can be tedious, time consuming, and error prone. Asset Bundler solves this for you.
Asset Bundler makes shipping the specific assets that are used for the release of your game more reliable and repeatable. Reliability is based on an underlying dependency system. If you make changes to your project and add, remove, or update assets, Asset Bundler uses the dependencies to automatically determine which assets to include. Repeatability is based on underlying configuration files that provide consistency each time you run Asset Bundler.
Scripting gameplay
O3DE includes two scripting technologies for creating logic and behaviors: Script Canvas and Lua.
Script Canvas is a general purpose, visual scripting environment. In Script Canvas Editor, you lay out and connect graphical nodes that provide a visual representation of the logic flow. Script Canvas offers an approachable and easy-to-read environment to author behaviors using the same framework as Lua and C++. You can use Script Canvas to create scripts without needing to know how to code.
Lua is a powerful, fast, lightweight, embeddable scripting language. Lua facilitates quick iteration in your project because you can run your changes immediately without needing to recompile your source code.
Learn more about Script Canvas and Lua in Scripting Gameplay in O3DE.
Release runtimes
O3DE offers both client (single-user) application and dedicated server runtime support. Your project can produce either (or both) as part of a build, allowing you to easily share code and assets where it makes sense.
Client (“Launcher”)
The Client, also called the Launcher, is the bootstrap application that loads and runs your project. This application is based on the core O3DE libraries and is responsible for loading your project and Gems. The client runtime provides enough functionality to handle bootstrapping the rest of the systems, handing application lifecycle and some core systems like input and crash handling.
The Client is the binary application that would be shipped to customers or end users to run.
Dedicated server runtime
The dedicated server runtime is meant to be run in an environment where it provides a shared session to many clients. Dedicated runtimes don’t have rendering or audio capabilities enabled. Instead, they load simulations and provide synchronization between them. The most common example of a dedicated runtime is a multiplayer game server.


